They’re Coming! Take Steps Now to Battle the Bugs

They’re Coming! Take Steps Now to Battle the BugsMany bugs are dormant over the Winter months. Once Spring arrives, they are back in full force. While you are working on Spring yard projects, remember to practice some preventative pest control. Head pests off at the pass before they can invade your home and garden.

Boost Pest Control Effectiveness

Taking steps now will keep you bug-free in the Summer months ahead. Whether you choose chemical or natural pest control, you can take steps to boost their effectiveness around your home. Here are a few suggestions on where to begin.

7 Proactive Steps for Battling Bugs

  1. Remove standing water and fix leaks – Don’t give mosquitos a place to breed. If you have a water fountain, treat it with drop-in mosquito pellets. Keep your pump working because moving water does not allow them to lay eggs.
  2. Clean gutters – Avoid letting leaves block downspouts by cleaning them twice a year.
  3. Remove yard debris – Fallen piles of leaves and tree branches are prime hiding places for mosquitos and other pests. They also spread mold and fungus throughout your garden.
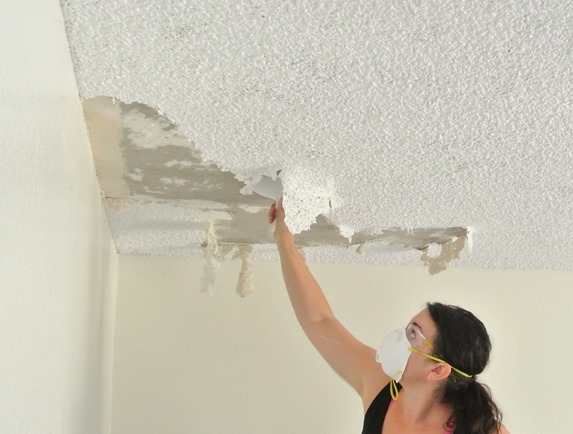
  4. Seal your home – Look for cracks in your foundation, around windows and exterior pipes. Bugs can use these to enter the home. Replace old door seals as well.
  5. Deny access to food – Hang bird feeders away from the house, keep pet food in airtight containers and make sure garbage cans have properly fitting lids.
  6. Fence your garden – Install a wire fence around your vegetable garden.
  7. Cover large openings – Use wire mesh or hardwire cloth to cover openings like attic fans and roof vents. This will keep squirrels out. Check chimney caps to see if they need to be replaced.

Leaks and Moisture Encourage Pest Problems

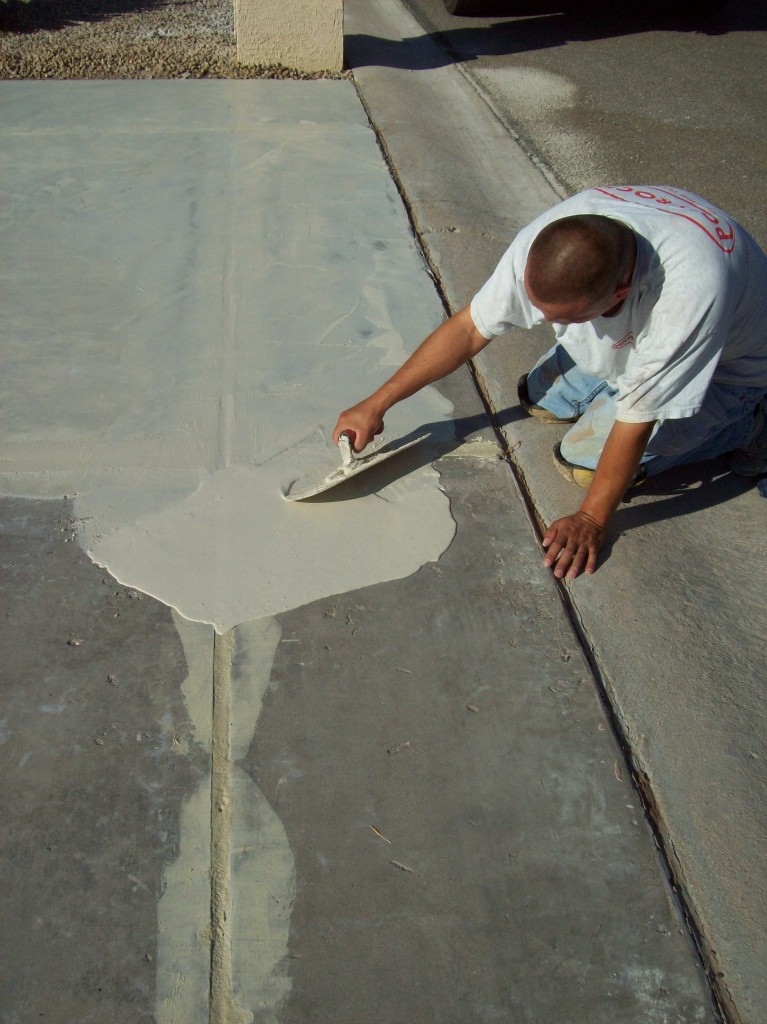
Pests are attracted to moisture. By eliminating leaks or other moisture issues you can solve the majority your insect problems. Start by inspecting your crawlspace and foundation for moisture seepage. Seal any cracks with caulk or compound cement. If you have a drainage problem around your foundation, consider re-grading the landscaping to drain water away. Channel downspouts in a new direction.

Be Careful Using Insecticides Around Pets and Children

Treating around the perimeter of your home with insecticide is one way to stop bugs from entering your home. Though many products claim to be safe for humans and pets, use caution when applying. Keep children and pets inside while spraying and then for a couple hours afterward to allow the chemicals to dry.

Go Natural with Your Pest Protection

If you are worried about harmful toxins in chemical pesticides, try some natural alternatives. Insecticide soaps are made from organic products and are quite effective. If you want to avoid spraying chemicals of any sort, here are a few ideas:

  • Plant Lavender or Rosemary near your patio or deck to ward off mosquitos.
  • Sprinkle Cinnamon in a child’s sandbox to keep ants out.
  • Mix white vinegar and water to spray on spiders and their webs.
  • Carry dryer sheets in your pocket to keep mosquitos and gnats away.
  • Sprinkle citrus peels around plants infested with mites or spiders.
  • Grapefruit rinds attract slugs; once they take hold you can throw them in trash.
  • Crushed Basil in your cabinets will deter cockroaches.
  • Use Ladybugs to get rid of aphids on your roses.

Welcome Natural Insect Predators to Your Garden

If you want to up the ante, invite natural predators like swallows, finches or even bats to share your garden. Install a bat house in a tree away from your home. Bats sleep during the day and hunt for insects at night. You will probably never see them, although you may notice a decrease in the number of mosquito bites you endure.

Don’t Let Insects Ruin Your Day

Be proactive in fighting pests this year. A few changes around the house can make all the difference. Take the time to treat for bugs now and keep them in check. Enjoy this Summer pest-free. This is your home, show those bugs who’s boss.

Expert Advice

From sprayer tanks and insect foggers to ladders and bobcats, our expert staff is ready to help you protect your home from pests. Looking for a natural way to battle bugs? Our blog, Keeping Critters at Bay Part 3 – No Poison Pest Control, has plenty of helpful, non-toxic suggestions for preventing bugs. As always, if you have any questions about what to choose, pricing or how-to’s, don’t hesitate to contact us. Stop by our store — we’re open seven days a week.

Categories: DIY Projects, Gardening and Lawn Care, How-To's, spring checklist | Leave a comment

Get Those Trimmers Out! Get Your Yard Back in Shape!

Get Those Trimmers Out! Get Your Yard Back in Shape!Now that Spring is here, many of you are diligently working time to reclaim your yard. Getting out those trimmers to cut back early flowering trees, shrubs and ornamental grasses will go a long way to improving the look of your garden.

To Prune or Not to Prune

Pruning isn’t just done in the fall. Some plants benefit from having their dead foliage left attached over the winter. This protects their tender roots. Still, pruning stresses plants. Wait until they have flowered and gone dormant before attempting it. Pruning a plant while it is actively growing invites pests, diseases and fungus to enter through the wound.

Plants to Trim Back Now:

  • Woody perennials – Plants like Artemisia, Buddleia and Lavender bloom on new growth. Pruning now encourages them to send out new foliage.
  • Evergreens – Some species don’t go dormant but do turn brown. Trim off these wilted leaves and apply some fertilizer.
  • Flowering trees – Most early blooming trees set their buds last fall so you are safe to prune now. Avoid taking more than a third off the branches.
  • Roses – Prune after flowering. Even species like repeat bloomers can benefit from tidying up. Remove dead or weak growth.

Ornamental Grasses – Adding Interest All Year Long

Ornamental grasses add beauty to the landscape year-round. If you left yours up over the winter (the birds thank you for that!), now may be the time to cut it back. It depends on the type of grass you have. Cutting your grasses back exposes the crown or base to sunlight and rain.

Two types of grasses:

  • Cool season – Varieties like Fescue, Ribbon grass, Feather grass and Tufted Hair-grass produce new shoots in the early Spring and flower by early Summer. Cut the dead growth back before new sprouts get too high. Avoid damaging the crown or base. This can kill the plant.
  • Warm season – Species like Japanese Blood grass, Maiden grass, Fountain grass and Pampas grass produce new growth in late Spring/early Summer and flower in late Fall. Since these grasses send up new stalks later, you have more time to cut them back. Rake out dead foliage from the base to allow the sun to penetrate.

Prepare for Battle When Cutting Ornamental Grasses

Cutting ornamental grasses can be a bit of a challenge, as these plants like to fight back. Many species have sharp-edged leaves, so be sure to wear heavy gloves, long sleeves and protective eyewear when tackling them. Bind the stalks with rope in a couple of places to make for easier clean-up. With a hedge trimmer, cut the grass back by a third. Now is also the time to divide your plantings. Use a sharp-edged shovel to portion off root sections to transplant.

Give Your Garden a Little TLC

Pruning and freshening up your landscape will get your garden back in shape. Take the opportunity to inspect your plants and determine the ones that need a little extra TLC or fertilizer. Spring clean-up is a daunting job. Never fear, soon your hard work will pay off and the garden you missed all winter long will be a reality.

Expert Advice

Not sure what tool to use for a tough gardening job? Whether it is hedge trimmers and weed eaters or tree pruners and wheelbarrows, our expert staff is ready to recommend the best tool for the job. If you still need help organizing your gardening to-do list, Tackle Spring Clean Up in Your Yard With this Handy Checklist gives helpful tips. As always, if you have any questions about what to choose, pricing or how-to’s, don’t hesitate to contact us. Stop by our store — we’re open seven days a week.

Categories: DIY Projects, Gardening and Lawn Care, How-To's, spring checklist | Leave a comment

Get Your Outdoor Furniture Ready for Summer Entertaining

Get Your Outdoor Furniture Ready for Summer EntertainingGetting your deck or patio ready for summer entertaining is a chore most people are looking forward to. If you stored your furniture and cushions over the winter, you are ahead of the game. If you didn’t, we have some simple tips to help get your outdoor furniture ready to go.

Energize Your Old Stuff

The first step is to clean and inspect your furniture. See what needs to be re-painted or repaired. Don’t toss your old furniture. Energize it with a splash of color or vibrant new fabrics on the cushions. You’d be surprised what a thorough cleaning and a fresh coat of paint can do!

5 Tips for Cleaning Your Outdoor Furniture

  1. Sweep or vacuum off dust and dirt – Covering your furniture while in storage will cut down on some cleaning but it does not eliminate it. Dust can build up. There may also be a few unwanted guests tucked inside.
  2. Give it a gentle cleaning – Don’t power wash them. The harsh spray can wear down any protective coating on the furniture or fabric.
  3. Avoid harsh cleaners – Start with mild dish soap and warm water. Some cushion fabrics are machine washable but use the gentle cycle. Never put them in the dryer.
  4. Fight mold – Sometimes mild soap alone will not remove stains. Use oxygen bleach and a soft scrub brush first. If you use chlorine bleach, test a small hidden section. Chlorine will kill the mold but it can break down your fabrics. Wear protective glasses and mask when working around mold.
  5. Dry in the sun – Allow your furniture to air dry completely. If you clean your umbrellas or hammocks, stretch them out to help retain their shape.

A Gentler Approach to Cleaning Outdoor Furniture

The material your outdoor furniture is made of will determine how you clean it. As tempting as it may be to power wash everything and be done with it, a gentler approach keeps your décor looking better longer.

How Do I Clean This? 

  • Wood: Use mild soap and a soft scrub brush to wash the dirt off. If the furniture is badly stained, try an oxygen bleach cleaner. You can also lightly sand it and clean with a wood brightener. After your furniture is completely dry, apply a clear sealant to protect the wood from UV rays, dirt and mildew. Do this every 1-3 years.
  • Metal: Most metals except aluminum rust. Catching it early is key. Clean with mild soap and water and allow to dry completely. Sand rust spots and touch up with paint. Apply a clear sealant when dry to protect from sun and moisture. A good coat of car wax helps repel dirt. Spray silicone lubricant on any hinges, joints or springs. Inspect your umbrella pole and stand for rust damage, too.
  • Fabric: Outdoor fabric resists moisture but it can get dirty and develop mold. Use a mild soap and let them air dry. Re-treat the cushion covers with fabric protector every year to keep them looking like new. Checked the foam inserts for mold. If badly soiled, freshen things up with new ones!

Did I Miss Something?

When getting your deck or patio ready, don’t focus only on your furniture. There are plenty of items that get overlooked and can use a good scrubbing. Here is a list of things to check out:

  • The grill – Even if you used it all winter, give it a clean start for the summer. Use a wire brush to scrub the grill and the inside elements.
  • Umbrellas – Remove the fabric and wash on the gentle cycle. Dry it outside. (Don’t fold them up wet! Mold will grow.) If the fabric gets wrinkled, iron on a low setting.
  • Storage bins – No one wants to pull a pool float out with spiders on it. Take everything out and vacuum the interior. Rinse down the pool floats, too.
  • Plastic deck chairs – Use mild soap and a scrub brush to clean them. For aging, discolored chairs, consider spray painting them in a bold new color.
  • Outdoor ceiling fans – If your outdoor dining area or porch has an overhead fan, wash the blades and oil the motor.

Save Money by Maintaining Your Outdoor Furniture

Why buy new tables and chairs every year? By taking the time to clean and inspect your outdoor furniture, you extend its life. Spend a weekend whipping your outdoor space into shape. Summer is right around the corner and you’ll be entertaining family and friends before you know it.

Expert Advice

From orbital sanders and grinders to paint sprayers and pressure washers, our expert staff is ready to help you find the right tool to clean and repair your outdoor furniture. Planning ahead? Want to make sure you stow your outdoor furniture the right way at summer’s end? Check out our blog, Outdoor Entertaining Storage Made Easy in 8 Steps, for tips on the best way to pack things away. As always, if you have any questions about what to choose, pricing or how-to’s, don’t hesitate to contact us. Stop by our store — we’re open seven days a week.

Categories: How-To's, Restore and Renovate, spring checklist | Leave a comment

Planting Your Summer Garden – We Can’t Wait to Eat Our Veggies!

Planting Your Summer Garden – We Can’t Wait to Eat Our Veggies!Does the fluctuating Spring weather delay your completion of a vegetable or flower garden? If so, there is still plenty of time to add new plants you’ll can enjoy this Summer. We have a few suggestions on what to plant in your garden.

Know Your Zone, Indiana

Before you start your garden or supplement an existing one, know your plant hardiness zone. This will help you determine when to start planting and when to wrap things up. The frost-free growing season for Indiana is tentatively 163 days (April 27 – October 7).

The Plant Hardiness Zones for Indiana are:

  • Zone 5b – Upstate (Lafayette)
  • Zone 6a – Central (Indianapolis)
  • Zone 6b – South (Evansville)

Vegetables for All Seasons

Vegetables are either cool-season or warm-season plants. Cool-season plants have a growth cycle from early Spring to early Summer and then again in the Fall. Warm-season vegetables have only one cycle, from late Spring to late Summer. Generally, plants grown from seeds are started indoors and transplanted at the appropriate time. This gives them a strong start in the garden.

Spring Vegetables on the Way Out

Cool-season vegetables are wrapping up now. Asparagus, cabbage and spinach are beginning to fade as temperatures rise. Some cool-season varieties can carry over into Summer but they will eventually be affected by the heat. Radishes turn fibrous and develop a sharp taste when subjected to the sizzling summer sun.

Plant Warm-Season Vegetables Now

If you couldn’t start your seeds for warm-season vegetables in early Spring, buy established plants at your local garden shop. Many warm-season varieties take too long to mature to grow from seeds now. For example, watermelon takes three months to mature from seed to harvest. You wouldn’t be able to enjoy the fruits of your labor before the Fall.

10 Vegetables & Herbs to Start in Your Summer Garden

  • Basil and Oregano
  • Beans
  • Corn
  • Cucumbers
  • Okra
  • Peppers
  • Summer squash
  • Sweet potatoes
  • Tomatoes
  • Watermelon

Honey, Have You Seen My Pruner?

Planting vegetables isn’t the only gardening activity this Summer. Flowers, shrubs and trees all demand our attention. Whether it is adding new plants to your landscape or remembering where you left your pruner, there is plenty to do. Here’s a quick rundown.

Summer Gardening To-Do List

  • Trim Spring flowering shrubs and trees – Once they stop blooming, cut them back.
  • Fertilize roses – Check for pests and diseases. Start fertilizing your roses throughout the Summer.
  • Attach supports to tall perennials – Keep leggy plants from toppling over with plant supports or stakes.
  • Pinch chrysanthemums – Trim the tips to keep them bushy.
  • Sow seeds – Plan to have ornamental kale and flowering cabbage in Fall.
  • Divide plants – Thin daffodil bulbs every three years. Divide irises, primroses and arabis.
  • Share cuttings – If you want to get rid of the plants you divide, share with friends and neighbors.
  • Add compost – Spread a layer over your beds and work into the soil.
  • Mulch – Add fresh mulch to supplement what you already have in your beds.
  • Set out birdfeeders – If you haven’t done this already, the birds are waiting!

Enjoy Your Garden This Summer

Spending time outdoors in your garden is one of the most relaxing activities you can do. It has been found to lower stress and improve physical health. Whether you grow vegetables in containers or in raised beds, treat every new plant or technique as a learning opportunity. The best thing you can do for your garden is to enjoy it.

Expert Advice

From tree pruners and Honda tillers to wheelbarrows and shovels, our expert staff can help you take care of your gardening needs. Are you more interested in herb gardening than vegetable gardening? Our blog, A Message to the Beginner of Herb Gardening, can get you started in the right direction. As always, if you have any questions about what to choose, pricing or how-to’s, don’t hesitate to contact us. Stop by our store — we’re open seven days a week.

Categories: Gardening and Lawn Care, How-To's, spring checklist | Leave a comment

Give Your Yard a Greener Lawn

Give Your Yard a Greener LawnDo you love to mow grass? Do you take the appearance of weeds as a personal insult? Then you are suffering from Lawn Addictive Disorder (LAD). As a part of an ever-growing (but silent) community of lawn obsessed homeowners, you are chomping at the bit to fire up your lawn mower. We are here to help you manage these impulses and get ready for your favorite pastime. Forget baseball season, it’s mowing season!

Don’t Stress Over Your Grass

If you are a lifelong LAD sufferer, you spend a great deal of time stressing over the condition of your lawn. Grass doesn’t have to be a source of anxiety. If managed correctly, you will be cutting patterns across your lush sod soon enough.

Prepare for Mowing Season

  • Let the soil dry out – If your area receives a lot of rain and snow, let the soil dry completely before working it to avoid further compaction.
  • Test the soil – This helps determine the best fertilizer to add to soil. For more on the different supplements available, Get a Head Start on Spring Gardening with Fertilizer gives helpful suggestions.
  • Find the right time – Avoid rushing out to mow your grass right away. Allow it to grow to at least two inches before cutting it back by a third of the desired height.
  • Use a mulching mower – Adding grass clipping back to your lawn provides it with 25% of the nitrogen it needs. Don’t leave large clumps of clippings in your yard. It will kill the grass underneath and invite pests.
  • Sharpen mower blade – A dull blade will stress the grass and encourage disease.

Give Your Grass What It Needs – Nitrogen

Nitrogen helps grass build strong roots and lush leaves. Apply a nitrogen-rich fertilizer in early Spring to encourage growth and then again later to help sustain it through the Summer heat. Water at least one or two days following an application to make sure it gets to the roots.

Practice Good Lawn Maintenance

If obtaining a beautiful-looking lawn is keeping you up at nights, stop stressing. Practice good lawn management and you, too, can have a gorgeous green yard. Here are a few things you should do yearly to keep your turf true to form:

  • Remove thatch – This layer of dead grass and weeds can choke the root system. Rent a dethatching machine to remove it and rake up the debris. If your grass shows signs of disease, don’t add the clippings to your compost pile to avoid spreading them.
  • Aerate or plug Aeration machines pull plugs of grass and soil up allowing air, moisture and fertilizer to get to the roots. This helps soil that has been compacted during Winter.
  • Evaluate your soil – What your grass is planted in matters. Enhance your soil’s health by feeding it a layer of compost after you aerate. Work the organic matter into the plug holes with the back of a rake or stiff broom.
  • Water regularly – Allow your grass to dry out (almost wilt) between each watering. It will encourage the roots to grow deeper and tolerate drought better. Give grass at least one inch of water weekly.

The Best Weed Control is a Healthy Lawn

Face it, weeds happen. The best defense is keeping your grass healthy. A strong root system crowds out weeds. This is the best time to tackle weed issues, before they take over. Different weeds require different products. Ask your garden center for advice. Some herbicides like Round-up will kill everything (grass, flowers, even pets) so be careful when using.

Tackle Those Pesky Weeds

  • Spot treatments – Apply herbicide to broadleaf weeds. Spray dead spots with a fungicide early before it spreads. Thatching will help prevent this.
  • Dial sprayer – When the weed problem is widespread, add a dial sprayer to your hose to administer the herbicide over a wide area. Protect flowers and shrubs with plastic when you apply.
  • Broadcast spreader – Prevent crabgrass by applying a granular weed killer early in the Spring.
  • Dig them out – Sometimes the old ways are best! Use a garden knife to dig dandelions and creeping buttercups up by the roots. 

Obsess Less and Enjoy Your Lawn More

Living with your lawn obsession is possible, if you practice good grass maintenance. Make it your objective to enjoy your yard, not stress over it. Set your sights on loftier goals like cutting the pattern of your favorite baseball team into your front lawn. Your homeowner’s association will love it!

Expert Advice

From rakes and Honda mowers to dethatchers and aerator/pluggers, our expert staff is ready to help you with your lawn obsession. Do you need to re-seed your grass but are not sure how? Our blog, 3 Options for How to Replant Grass in Your Yard, has helpful DIY tips on the best method for you. As always, if you have any questions about what to choose, pricing or how-to’s, don’t hesitate to contact us. Stop by our store — we’re open seven days a week.

Categories: DIY Projects, Gardening and Lawn Care, How-To's, spring checklist | Leave a comment

Springtime Fertilizer for a Hungry Lawn and Garden

Springtime Fertilizer for a Hungry Lawn and GardenIs your garden calling you? If so, it is probably saying “Feed me, feed me”. In Spring, when everything is coming back to life, feed your lawn and garden. Finding the right time is the tricky part. Apply fertilizers after the last frost but not too early. Spring rains cause nutrients to leech away into the soil before your plants can see any benefit. Wait until you see the green popping through!

Why Fertilize?

If you have supplemented your soil with compost and organic matter over the Fall, you are ahead of the game. If not, no worries. Test your soil’s Ph level to determine what nutrients are needed. Don’t guess, it is easy to over-fertilize when using commercial chemical products.

When Do I Fertilize?

Are you giving your garden a good start or are you trying to increase the number of blooms and fruit you produce? Giving your garden what it needs depends on what stage of growth it is in. Established plants need less attention.

The two approaches to fertilizing:

  • Long-term – To replenish nutrients to the soil throughout the year.
  • Short-term – To feed plants now to promote growth.

Give Your Lawn a Nitrogen Rich Supplement

If you are wanting your grass to put on a show for you this summer, make sure the soil is rich in nitrogen. Winter weather can compact your soil and strangle your grass. Aeration allows for better drainage, improved oxygen levels and easier absorption of fertilizers. If you are laying new sod, give the soil a good dose of organic matter first.

Fertilizers Can Be a Mixed Bag

Choosing the right fertilizer is a chore all by itself. There are so many to pick from at the garden center. A good rule of thumb – organic fertilizers won’t contaminate the ground water and are less likely to cause damage if overused.

Types of Fertilizers

  • Compost – Use an aged mix to avoid plant burn. Work it into the top six inches of soil.
  • Manure – Avoid using fresh manure. It gives off heat and ammonia as it breaks down that can harm tender plants.
  • Chemical fertilizers – Use the right NPK (nitrogen, phosphorous, potassium) blend depending on your needs. Add before planting to allow it to dissipate into the soil and not burn the roots.
  • Organic fertilizers – Consider trying bio-stimulants like liquid seaweed or kelp that you can spray directly on plants or soil and use monthly.

Show Your Garden Some Love

Supplement your garden’s soil before planting with bone, blood or fish meal. These are good options beyond the usual compost and manure. Vegetables will also need a slow-release fertilizer throughout the growing season. Start adding it after your plants have established and re-apply it every few weeks. You can also plant green fertilizers like clover, which will deter weeds and enrich the soil when it dies back.

Your Garden Will Thank You

Help your garden and lawn get off to a great start with fertilizer. Like you, it is ready for Winter to be behind it. Feed your lawn and plants the nutrients they need to grow strong and healthy. Now, when you hear garden calling, it is probably saying thank you!

Expert Advice

From shovels and wheelbarrows to aerator/pluggers and Honda tillers, our expert staff is ready to help get your Spring yard projects started. Want more tips on growing the perfect lawn? Our blog, Planning for a Green Spring – Feed Your Lawn, will get you off to a great start. As always, if you have any questions about what to choose, pricing or how-to’s, don’t hesitate to contact us. Stop by our store — we’re open seven days a week.

Categories: DIY Projects, Gardening and Lawn Care, How-To's, spring checklist | Leave a comment

Gardening Season is Here! Time to Play in the Dirt

spring gardening checklistIf you are chomping at the bit to get outside and play in the dirt, your chance is almost here. According to the Farmer’s Almanac, our last Spring frost should be around April 18. After that, you should be good to go to get plants in the ground. Getting your Spring garden and yard checklist done means rolling up your sleeves and cleaning out those flower beds. Get busy, you have a lot to do!

Find Your Hardiness Zone

If you need reminding which hardiness zone you live in, you are not alone. Our state seems to be laid out like a jigsaw puzzle. Still, they say we are looking at 182 days of great gardening weather ahead, so bring it on!

Here are the hardiness zones for Indiana:

  • Zone 5B – Northern Indiana
  • Zone 6A – Central Indiana (and pockets of N. Indiana) including Indianapolis
  • Zone 6B – Southern Indiana

Top 10 Tasks for Your Spring Gardening Checklist

Get your Spring gardening checklist in order. Tackling some of the list now will give you more time to focus on planting new varieties once the last frost has passed. 

  1. Remove dead plants – If you didn’t do this during the Fall/early Winter, do it now.
  2. Test the soil – Harsh winters can deplete nutrients. Testing will let you know how to amend it before planting.
  3. Weeding and composting – Pull early weeds now before they take hold. Amend your soil with compost, manure or new top soil.
  4. Prune perennials – Many die back to the ground in the Winter. If you have dead growth stalks, don’t cut them until you see green at the base.
  5. Cut back ornamental grasses – Get rid of old growth.
  6. Roses – Inspect them for diseases and remove dead limbs.
  7. Trees and shrubs – Prune spring flowering plants after they have lost their blooms.
  8. Evergreens – Fertilize them with specially formulated food.
  9. Divide and transplant – Separate perennials to prevent overcrowding. Start a new bed or share the extra plants with friends.
  10. Mulching and edging – Give seedlings an opportunity to peek through before covering them up. Let the soil warm up and dry out slightly before adding mulch to avoid encouraging mildew. Edge your beds to keep grass at bay.

Outdoor To-do List Includes Repairs and Cleaning

Spring gardening projects are not limited to planting and mulching. Inspect your landscape for any basic repairs that are needed like dead tree removal or broken branches. Retaining walls may need shoring up or replacing. Bird feeders and chicken coops need cleaning. If you don’t have a compost bin, now is a great time to build one.

If you are as excited about the warm weather as we are, you won’t mind having a list of things to do. Are you ready to play in the dirt?

Expert Advice

Need a few more outdoor projects? This handy list, 11 Lawn and Gardening Tips for Spring, will round out your DIY to-do list. From Honda tillers and trimmers to edgers and wheelbarrows, we have what you need to tackle all of your Springtime gardening checklist. Let our expert staff help you find the right equipment for your DIY projects. As always, if you have any questions about what to choose, pricing or how-to’s, don’t hesitate to contact us. Stop by our store — we’re open seven days a week.

Categories: DIY Projects, Gardening and Lawn Care, spring checklist | Leave a comment

From Plain to Polished – Molding and Faux Beams Add Interest

DIY Project: How to Install Crown MoldingLooking for a weekend project that can quickly transform a room? Consider adding molding or faux ceiling beams. These decorative touches add architectural interest while giving any area a polished look. If you have a plain Jane room screaming for something more, decorative moldings and beams are just the ticket.

An Extra Set of Hands Always Helps

Decorative molding adds detail while making a room appear larger or taller. It can help you creatively transition from one material to another. With accurate measurements, precise cutting and an extra set of hands, installation is easy. Some molding materials like plaster require a skilled technique, which is why leaving it to the professional is the best option.

10 Types of Decorative Molding

  1. Casing – Covers the gap where a door frame or window meets the wall.
  2. Baseboard – This molding is used in addition to quarter-round to blend where the floor meets the wall.
  3. Crown – Also called cornice molding, it is used to blend where the walls meet the ceiling. Can give the illusion of height to a room.
  4. Chair rail – Originally meant to protect walls from furniture bumping them, the chair rail is often used to transition between two different wall coverings (for example, paint and wallpaper).
  5. Picture rail – If you don’t want to damage your walls with nails or hanging brackets, install a picture rail to display your artwork.
  6. Cove – This concave shaped molding is used like crown molding and is less ornate.
  7. Dentil – A style of crown molding with a pattern of evenly spaced blocks resembling teeth. Used in historical homes.
  8. Egg and dart – A pattern of crown molding that has oval egg shapes alternating with V-like darts. Styled after the facades of Greek temples.
  9. Batten – Also known as Board & Batten, this is used to hide the joints between wall panels.
  10. Bead and pearl – This crown molding style has a row of symmetrical spheres or pearls running along it. Often combined with other crown molding design elements like leaves, darts or spindles to form elaborate combinations.

New Materials Make Installation a Breeze

Molding is no longer just made from wood. In the past, trimming a curved wall would have been tricky. With today’s bendable substances, like flexible polyurethane, installation is a breeze. It cuts and mounts like wood molding yet conforms easily to whatever angle you need.

Most Common Materials Used for Molding:

  • Wood – The most popular material used, wood is affected by humidity, which will cause it to expand and contract. Use a flexible caulk on the joints to avoid gaps later.
  • Plaster – Beautiful, elegant and tricky to install. Leave this job for the professionals. Can run $25-50 per foot installed.
  • Flexible polyurethane – This lightweight, limber material cuts and installs like wood. It can also be painted or stained.
  • Lightweight polyurethane – Unlike wood, this product will not split or crack during installation.
  • Metal – Used with a metal tile ceiling, this crown molding comes pre-finished but can be painted. Pre-formed corners make installation easier.
  • Hollow PVC – Great for running cables or wires around a room so you don’t have to cut into your walls. Comes in 8 foot sections.

Faux Beams Create Visual Interest on Your Ceiling

Things are literally looking up for decorative molding. Designers are adding intricate molding designs on ceilings to give rooms a visual flare the way artwork does. Need more of a statement? Add drama with faux beams on your ceiling. Fashioned from wood or plaster, these beams can create a grid-like pattern or separate different spaces in an open floor plan.

Show Buyers You Have an Eye for Detail

Consider installing decorative molding or faux beams as your next DIY project. Finishing a room with these design features lets potential buyers know you have an eye for detail. Boost your home’s value by adding these decorative items today and reap the rewards at closing.

Expert Advice

From nail guns and miter saws to ladders and paint sprayers, our expert staff is ready to help you decide on your next DIY project. Need some additional design ideas for your home? Our blog, Tried and True Interior Decorating Tips, has great suggestions to get you fired up for your next project. As always, if you have any questions about what to choose, pricing or how-to’s, don’t hesitate to contact us. Stop by our store — we’re open seven days a week.

Categories: DIY Projects, How-To's, Restore and Renovate | Leave a comment

Select the Right Material for Your DIY Flooring Project

How to Start Your DIY Flooring ProjectNothing sends a household into a tizzy like hearing the phrase, “let’s redo the floors”. No doubt about it, flooring is a big-ticket item, one that can add value and appeal to your home. If you are looking for a transformative DIY project this year, consider replacing your floors.

What is Your Floor Telling You?

How do you choose the best flooring material for your home? By listening to what your floor is telling you. Take the time to look at your floor. Where are the problem areas? Are you replacing it for aesthetic reasons or because it wears in certain places? There are pros and cons for each flooring product, so assess your needs and make the right selection.

Considerations When Selecting Flooring

  • Foot traffic – Find the wear patterns on your floor, then decide on a durable material for the entire house or different materials in rooms with less traffic.
  • Insulation – You may hate carpet but it does keep the floor warm in the wintertime. Hardwoods are less insulating and will amplify sound throughout your home.
  • Sunlight – Direct sunlight can discolor and break down flooring like carpet fibers. Look for products with UV protective coatings or materials.
  • Overall use – If you have kids and pets, your floors get cleaned a lot. Select materials that don’t require special care and can tolerate spills.
  • Moisture resistance – A kitchen, bathroom or laundry room need flooring that will not warp when exposed to moisture. (Leaks happen!)
  • Allergy protection – Carpets trap dust, mold and pet dander, so avoid them if someone in your house has breathing sensitivities.

Don’t Let the Options Overwhelm You

If it has been a while since you shopped for flooring, the options available will surprise you. From exotic hardwoods and laminates to vinyl that looks like tile and tile that looks like wood, your choices can be overwhelming.

7 Basic Categories of Flooring

  1. Solid wood – Still one of the most popular choices, hardwood flooring is durable and can be re-finished. Buy pre-stained boards to make installation easier.
  2. Engineered wood – A veneer of real wood is applied to a plywood center. While cheaper than hardwoods, they still dent easily and scratch. Depending on the thickness and quality of the top veneer, the boards can be re-finished a few times before needing to be replaced.
  3. Laminate – It has a photographic applique over a plywood center. Laminate is easy to install, resists stains and is now available in waterproof versions. Unlike engineered wood, its veneer cannot be refinished.
  4. Vinyl – Durable and easy to install, vinyl is one of the least expensive materials to use. It comes in sheets, tiles and planks and is great for high traffic areas.
  5. Linoleum – This eco-friendly alternative to vinyl can take a beating and is pet-friendly. Made from solidified linseed oil, it contains no harmful VOCs (volatile organic compounds). Available in sheets or rolls, linoleum has a life span of 20-40 years.
  6. Carpet – Stain-resistant, insulating and durable, it is still an economic option for homeowners. Not a good choice for allergy sufferers, though.
  7. Ceramic Tile – Great for areas that take a lot of abuse. While a very durable material, installation requires accurate measurements, cutting and grout protection.

Happy Feet, Happy Home

Selecting one material to use throughout your home may not be feasible. That’s OK! Designers are mixing flooring from room to room and even in the same room. Find what works for your family’s lifestyle and go for it. Your feet and your home will thank you.

Expert Advice

From flooring nail guns and sanders to linoleum floor rollers and tile cutters, our expert staff is always on hand to help you find the right equipment to handle your flooring projects. Just want to re-finish the wood floors you have? Our blog, What to Remember When Refinishing Your Hardwoods, has great tips to help keep you on track. As always, if you have any questions about what to choose, pricing or how-to’s, don’t hesitate to contact us. Stop by our store — we’re open seven days a week.

Categories: DIY Projects, How-To's, Restore and Renovate | Leave a comment

Give Your Deck a Facelift and Boost Your Home’s Value

how to build a backyard deckReady to tackle a DIY project that will increase the value of your home? Consider giving your plain looking deck a dramatic new facelift. By adding a few extra touches, you can give your family’s outdoor living space the wow factor they (not to mention prospective buyers) will love.

Does Your Deck Add to Your Home’s Appeal?

Adding a deck or renovating an existing one is one of the top five ways you can improve the value of your home. It even ranks higher than adding an additional bathroom! Ask yourself – does my deck add to the appeal of my home? A lackluster outdoor space does nothing to increase your family’s enjoyment or to catch a buyer’s eye. Take the next step and improve the look of your exterior by renovating your deck.

Before Renovating Your Old Deck:

  1. Pressure wash – A clean deck makes it easier to determine its condition.
  2. Inspect the structure – Are there cracked or rotten deck boards? Are the supports in good condition? If your deck is old and in bad shape, you may want to rebuild rather than trying to fix it.
  3. Re-finish – If your deck boards are in good shape, weather-proof it with a sealant. You should do this every couple of years.
  4. Determine your design/budget – Know how much you want to spend, then come up with a game plan and design ideas.
  5. Production – Decide if you want to do all of the work yourself or hire professionals like electricians or landscapers to do certain parts.

Improve How Your Deck Works for You

Think of ways to improve how your deck functions. Are there things you can add that will make dining outside easier? Do you want to create a mood (Zen and relaxing) or a feeling (romantic or rustic) in your outdoor area? Your deck project can run the gamut from adding design elements like cushions and pillows to constructing adjacent levels for seating.

Items That Dress Up Your Deck:

  • Lighting – If you like to cook outside, increase the lighting near your grill area. Add pod lights to the steps for added safety.
  • Railings –Use different materials like steel cables, glass panels, composite or vinyl to contrast the deck boards and add interest.
  • Additional entryways – To improve the flow and functionality, add another door onto the deck or a second set of steps to the yard.
  • Builtin seating – Add them around the perimeter to provide extra entertaining space.
  • Pergola or canopy – A shady place to sit and relax is always a winner.
  • Decorative planters – Build them onto the railing or as freestanding units that fill awkward or vacant corners.

A Wide Range of Materials are Available for Your Deck

If you do have to re-build all or sections of your deck, check out some of the new building materials available. While pressure-treated lumber is still the most commonly used material, composite and vinyl are gaining in popularity. They are durable, maintenance-free and often come with warranties but cost more than wood. Cedar, redwood and hardwoods like Ipe and Jarrah are fast becoming favorites due to the natural weathered patina they develop over time.

DIY Deck Spectacular

Give your deck a facelift and boost your home’s value. Add a few of our DIY projects to your Spring to-do list and transform a bland looking space into a spectacular entertainment area. Reap the rewards of your hard work well into the Fall and beyond. Party at your house!

Expert Advice

From pressure washers and post hole diggers to drills and band saws, our staff can help you choose the right tools to renovate or build your deck. Need advice on how to re-finish your space? Our blog, Seal and Stain Your Deck in 3 Easy Steps, has great tips on what you need for the final step of this DIY project. Don’t hesitate to contact us or stop by our store if you have questions about pricing or how to’s — we’re open seven days a week.

Categories: DIY Projects, How-To's, Restore and Renovate | 1 Comment

How to Reap the Rewards of Backyard Farming

backyard farmingFamilies question where their food comes from and why it costs so much. To stay on budget, many turn to backyard farming, which helps stretch their dollars. Urban agriculture is a booming business and many first-time farmers are taking the challenge. If you have been considering starting a garden or raising some chickens or bees, we’re here to help.

5 Things to Know Before You Start Backyard Farming

  1. Know Local Laws – Communities may restrict the size and placement of gardens and what animals you can raise.
  2. Start Small – If you are new to growing vegetables or herbs, consider planting containers first. The next year, if you want more, do plots or raised beds.
  3. Talk to Your Neighbors – You may love chickens but your next-door neighbor may not appreciate your rooster’s wake up call. Consider sharing a portion of your yield.
  4. Do Your Homework – Raising chickens, bees or goats takes routine care. Research online to determine which breed to buy and how to build their shelters.
  5. Join a Co-op – Find a community garden club or organization to join. You’ll gain helpful information while making new friends.

Invite Some Chickens to Your Home to Roost

Many people think raising chickens is a complicated undertaking but far from it. If you love fresh eggs and how cute these feathery critters are, start building a roost. Designs range from the simplest wood and wire structures to elaborate two-story creations. It is entirely up to you.

When raising chickens, keep in mind:

  • Choosing the Right Breed –Do you want chickens for the eggs, to eat or both? There are many different breeds. Your climate makes a difference, too. Hearty breeds like Silkies that have lots of fur-like feathers are best suited for colder climates. Some breeds are aggressive so select ones that are compatible.
  • Daily Care Requirements – Chickens eat bugs, worms and seeds but they still need a balanced diet of high protein chicken feed. Fresh water is a must.
  • Protecting Your Flock – Build an attached wire enclosed run onto your coop for your birds to exercise. Never allow them to roam unsupervised. Even in urban areas, there are still plenty of predators (cats, coyotes and hawks) that can injure or kill your chickens.
  • Interacting with the Birds – Chickens are social animals and need interaction. They consider you part of their flock so get to know them.
  • Life Span of Chickens – Hens live from eight to 10 years and their egg production drops off after three to five years. Decide whether you want to keep them as pets, or (you know) ask them to dinner.

The Buzz About Bees

Despite their stinging reputation, bees can peacefully co-exist with animals like chickens. The birds instinctually don’t go near the entrance to the hive and bees appreciate having the chickens eat the pests that can destroy their hives.

Benefits of Adding Bees to Your Backyard Farm

  • Nutrition – One hive can produce 40 plus pounds of honey depending on the climate.
  • Pollination – Having bees in your garden boosts the volume of flowers and vegetables you produce.
  • Ecosystem – By increasing small local colonies of beehives, you help support the overall bee population. Our world depends on bees to pollinate food sources and keep them growing.
  • Commerce – Not only will you have ample honey to sell, you can harvest the beeswax to make candles.

Goats Get the Job Done

Another animal to consider is the goat. Turn these four-legged lawn mowers loose and no weed is safe. Corporate America is even on-board! Google uses them for “landscape management” at their headquarters in Mountain View, CA. Besides the lawn service, you will have an ample supply of goat’s milk for cheese or bath soap plus all the cuteness you can stand. Just check to see if your community allows them before falling in love.

Reap the Rewards of Backyard Farming

There are so many benefits to be gained from backyard farming. Providing healthier food for your family, improving the environment and experiencing the joy of tending to some amazing creatures are just a few. Take the challenge to become more self-sufficient and live a greener lifestyle. You’ll be happy you did.

Expert Advice

Ready to tackle this year’s vegetable garden? Our blog, Yard/Garden To-Do’s Part 2: Planting a Vegetable Garden, will help you decide what you need to get started. Whether it’s tillers and wheelbarrows or nail guns and circular saws, our helpful staff can help you choose the right tools for your next DIY gardening project. Don’t hesitate to contact us or stop by our store if you have questions about pricing or how to’s — we’re open seven days a week.

Categories: Gardening and Lawn Care, How-To's, spring checklist | Leave a comment

Light ‘Em Up! – Your Outdoor Space Needs a New Grill

Light ‘Em Up! – Your Outdoor Space Needs a New GrillAdmit it. Like a runner on the starting blocks, you are waiting for grilling season to start! While some folks grill year-round, the majority of us hate standing out in the cold, waiting for steaks to finish. If you are considering kicking your outdoor kitchen up a notch or just buying a new cooker, now is the time to start planning.

Move That Idea Off the Back Burner

If you want to build an outdoor kitchen or redesign your deck area for better dining, work up your plans now. Decide what you want to do, how much professional help you might need, and your total budget. Once you decide, keep an eye out for pre-Spring sales.

Some things to consider for your outdoor cooking plans:

  • What type of grill or cooker to buy?
  • What fuel source (gas, charcoal, electric) do you want?
  • Do you need add-ons like burners (warming or cooking) or deep fryers?
  • What material do you want? Ceramic, steel, cast iron?
  • Does it need to be stationary or portable?

Choose a Grill for Every Cooking Style

  • Direct Heat – This is the typical charcoal or gas grill. The heat/flame is directed at the food, cooking it. It is prone to flare ups from grease dripping on flames.
  • Indirect Heat – Same concept as the direct heat grill but a ceramic device is placed between the heat source and food to prevent charring.
  • Ceramic – These insulated cookers (like Big Green Egg or Primo brands) are 400% more efficient at using charcoal, heat evenly and are safer than standard grills. They are also much more expensive compared to standard gas/charcoal grills.
  • Flat Top Griddle – A solid metal surface like most commercial kitchens allows you to cook a variety of foods. The downside? It does not grill the food.
  • Infrared Grills – Heats evenly with high temperatures. Cooking is not affected by wind or rain.
  • Electric – Portable units are quick and easy to use but should not be left outside.
  • Smokers – Primarily pellet fueled, they are good for low, slow cooking. Some do come with a wider range of cooking temperatures.

Find a Clean Source of Fuel

Before you buy another bag of the traditional charcoal, check out some eco-friendly fuel sources for your grill. Cheap charcoal emits cancer-causing toxins when burned that wind up on your food. Like you do with food, read the labels. Here is a rundown of some different materials to burn in your grill:

  • Natural Lump Charcoal – Contents should be hardwood material and any binders (to make the briquettes) should be free of glues and toxic chemicals.
  • Coconut Shell Charcoal – Chemical free, they use recycled waste shells as the main source. Burns just like traditional briquettes.
  • Propane and Natural Gas – A cleaner, more economical option but grilling purists say the taste is not the same.
  • Electricity – Unless you have ready access to an outdoor outlet, you will be running extension cords. Most are portable table-top grills that can be used indoors and outdoors.
  • Flame Disk – A disk made of ethanol biofuels that lights quickly. The ash produced can be recycled.

Design Around Your Family

If your family loves eating outdoors, create an area where you can relax. Consider hiring an outdoor design consultant to help with your plans. They can advise on the right materials and layout to use on your DIY project. Include modern conveniences like refrigerators and ice makers to make dining outside even easier.

Grilling Season is Almost Here!

Warm weather is fast approaching so get ready for grilling season! Whether your specialty is steaks and burgers or smoked turkeys, there are some incredible grill options available to you. You may have a hard time choosing, but no one says you have to buy just one!

Expert Advice

Need to re-design your outdoor dining area to accommodate a new grill? Our blog, Boost Outdoor Entertaining Potential with New Design Elements, has some great ideas on how to add pizzazz to your patio. Whether you need nail guns, ladders or pressure washers, our helpful staff can help you choose the right tools for your next home project. Don’t hesitate to contact us or stop by our store if you have questions about pricing or how to’s — we’re open seven days a week.

Categories: Gardening and Lawn Care, How-To's, spring checklist | Leave a comment

Expert Tips: Size Doesn’t Matter with Gardening

Expert Tips: Size Doesn’t Matter with GardeningIf you live in an apartment or condo and are envious of your homeowner friends’ large gardens, it’s time to accept the gardening challenge. Whether you want to plant flowers or grow vegetables, no area is too small for Mother Nature to take hold. Don’t let your lack of outdoor space keep you from enjoying the popular hobby of gardening.

Bountiful Benefits Grow from Gardens

Gardening offers lots of benefits. Not only is it a great way to grow your own food and enjoy the outdoors, it is a gentle form of exercise. Many find weeding and watering their plants a way to relax and clear the mind. Even with limited space, you can create your own quiet retreat while making your garden grow.

Here are a few tips on getting started:

  • Find the best location – You need at least 3-4 hours of direct sunlight.
  • Know your zone – Where you live affects when you start planting.
  • Get approval – Some apartment complexes and condo HOAs may have restrictions.
  • Start small – You’ll be tempted to overindulge but start with a few plants first.
  • Prepare your beds or containers properly – Good soil starts things off right.
  • Space them out – Give your plants room to grow.
  • Study growing habits – Native plants are the easiest to grow.
  • Don’t overwater or over-fertilize – Not all plants need the same care.
  • Beware of invasive plants – If the ad says fast growing, beware. Do your research.
  • Not all bugs are bad – Don’t overuse insecticides. Bees and ladybugs are beneficial.
  • Weed, weed, weed – Make it a habit. They sap nutrients from your plants.

Look for Planting Potential

Your imagination is the only limitation you face when gardening in a small space. Try thinking outside of the planter to create your own special oasis. Here are a few suggestions:

  • Containers – Don’t limit yourself to flower pots. Anything that holds soil can be a planter including boots, buckets, tin cans, a child’s wagon or even a hat.
  • Window boxes – There are some that do not have to be permanently mounted. Ones that attach to deck railings can blow over in windy conditions.
  • Standing planters – If bending over is a problem for you, consider raised garden beds. They are easy to construct out of pressure treated lumber.
  • Vertical gardens – An old wooden pallet or window shutter attached to a wall provides lots of planting potential.

As Urban Living Expands So Will the Need for Gardening

Many experts have predicted that by the year 2030 nearly 50% of the world’s population will live in urban areas. Adapting where our food sources originate and how we view our role in producing it is an issue facing our world today. Your little veggie garden isn’t as insignificant as you thought.

Veggies for Everyone!

If you have your heart set on planting a vegetable garden, start small. Ask your local garden shop which plants work well in containers. There are many tomato, lettuce, onion, kale and herb varieties that do well in compact spaces. If you share a balcony with a neighbor and you want to grow vines of beans, ask if they’d mind and then offer to share the harvest.

Reap the Benefits of Gardening

Gardening isn’t limited to those with large expanses of land. Growing flowers and vegetables in small plots or containers can be just as rewarding. Add some greenery to your life by starting a garden today. Join your local garden club or volunteer to work in a community garden. Let Mother Nature show you how to reap the benefits of planting a garden.

Expert Advice

From shovels and rakes to tillers and wheelbarrows, our expert staff is always on hand to assist gardeners with their next DIY project. If you are interested in growing herbs, check out our previous blog, A Message to the Beginner of Herb Gardening, to learn great tips on selecting and planting the right varieties in your garden. As always, if you have any questions about what to choose, pricing or how-to’s, don’t hesitate to contact us. Stop by our store — we’re open seven days a week.

Photo Credit: HGTV.com
Categories: Gardening and Lawn Care, How-To's, spring checklist | Leave a comment

Make Your Home a Smart Home with These Electrical Updates

If you’ve always envisioned living in a house where a computerized voice fulfills your every want or whim, then the future is here. Today’s technology is finally making life a little easier in the one place we need it, our homes. We’ve put together a list of easy DIY updates you can do around your abode to bring it into the 21st century.

Smart Home Electrical Updates

10 Wireless Devices for Your Smart Home

  • Smart Thermostat – They are as easy to install as the old thermostats and the control screens walk you through the set up.
  • Doorbell with Motion Sensor – Automatically know when a person is at your door and respond to them with your phone.
  • Accent Lighting – Some systems work with existing lamps and allow you to program them to shut on and off via your smartphone. You can also adjust brightness and color.
  • Irrigation Controller – You are no longer at the mercy of an old-fashioned timer, you can now use an app to control when the system runs and change it with weather conditions.
  • Garage Door Opener – Motion sensors automatically turn on lights and a timer will put the door down if you forget.
  • Security System – Most offer cameras and motion sensors. Decide if you want to monitor the system on your phone or have professional monitoring.
  • Home Electricity Monitor – This wireless device attaches to your breaker box and gives real time stats on your home’s energy usage.
  • Smoke & CO2 Detectors – They look like the old versions but these notify you on your phone if there is a problem.
  • Outdoor Lighting – Individual light fixtures now come with wireless features and an app to set timers from any device.
  • Electrical Outlets – These wireless plug-in devices allow you to control everything from the coffee maker to the TV from your phone. Some come with UPS outlets for charging that very busy smart phone of yours.

Consider a Controller Hub

Wireless devices can make life easier and save money but too many can be chaotic. Consider buying devices that work off a computerized voice controlled hub like the Amazon Echo or Google Home. These systems allow you to add on individual gadgets instead of buying single devices that you must control through multiple apps.

Upgrades Aren’t Just High Tech

Though it may not be high tech, consider upgrading your home’s basic electrical system. Every year over 51,000 residential fires are caused by electrical malfunctions. Install Arc Fault Circuit Interruption Outlets (AFCI), which shut off when an electrical arc or discharge is detected.

If you aren’t prepared to tackle electrical DIY jobs, do the prep work like running cables and installing wall boxes. Bring in a professional electrician to do the final power hook-ups and to make sure you are up to code.

Come Out of the Dark – Make Your Home a Smart Home

Modernizing your house is always a wise move. Advancements in technology can help make your home safer and more efficient. One last gizmo to mention may end many arguments around your house – it’s the motion-sensor toilet seat light. It lets you know the status of the seat with different colored night lights. Now that’s a device we can all get behind. Isn’t technology great?!

Expert Advice

Our expert staff is always on hand to help find the right equipment for your next DIY home update. Looking to address some outdoor lighting issues? You can find plenty of handy DIY tips in our blog, 9 Easy Steps to Keep Outdoor Lighting Bright. As always, if you have any questions about what to choose, pricing or how-to’s, don’t hesitate to contact us. Stop by our store — we’re open seven days a week.

Photo Credit: Hardware Journal
Categories: DIY Projects, How-To's, Restore and Renovate | Leave a comment

Plumbing Upgrades Can Save Water and Money

Plumbing Upgrades Save Money & WaterWith several states experiencing years of severe drought, most notably California, water conservation is fresh on the minds of homeowners and elected officials. In 2016, stiffer Federal regulations on the flow rate for residential water usage went into effect. To reduce your water usage and save money, consider making some quick DIY upgrades to your home’s plumbing.

Stop Running the Water

Before getting into what to fix first, think about the gallons of water flowing down the drain while you run the water as you brush your teeth, wash your hands or do the dishes. The average person in the U.S uses 80-100 gallons of water per day. Consider turning facets off while the tooth brush is working in your mouth or you’re lathering up your hands or scrubbing grease from pots and pans. We also lose 10 gallons of water a day to just to plumbing leaks.

What to Fix

  • Change out kitchen and bathroom faucets with newer, aerated models
  • replace older shower-heads
  • replace an older toilet with a new, low flow model
  • add a water displacement element to your old toilet’s tank
  • check the seals on your dishwasher for leaks

New Faucets are More Efficient

If your bathroom or kitchen faucets are looking old, why not replace them? Newer, more efficient models have built-in filters called aerators that reduce the flow rate. To add a separate aerator to an old fixture, unscrew the existing nozzle filter and screw in the new one. Many will come with new housing in case the old one is damaged when removing it.

New Shower-Heads for Even the Pickiest Bather

By simply changing your shower-head you can lower your water usage 25-60%. Older, low flow shower-heads have a flow rate of 5.5 GPM (gallons per minute). Today’s fixtures have a 2.5 GPM and provide a steady stream of water that will please even the pickiest bather.

2 Types of Shower-Heads:

  1. Laminar flow – emits individual streams of water
  2. Aerator – mixes air into the water stream for a softer spray

The Lowdown on Low Flow Toilets

Discussing low flow toilets used to be a dirty topic with homeowners due to the toilet’s lack of follow through. Today’s toilets aren’t your grandmother’s loo. They now use as little as 1.6 GPF (gallons per flush) compared to the old ones, which used 7 gallons.

4 Varieties of Toilets:

  1. Gravity assisted – based on the original design but are more efficient
  2. Pressure assisted – pressurized air in the tank forces water out through bowl
  3. Motor assisted – small 0.2 horsepower motor helps flush the system
  4. Dual-flush – 2 GPF selections; one low (0.8 GPF) and one high (1.6 GPF)

All these different toilets come in standard styles and require the same mounting materials as the old-fashioned ones, with one exception: motor assisted toilets require electrical power for the small motor.

Add a Water Displacement Element to Your Old Toilet

Not ready to replace your old toilet just yet? Consider adding a water displacement element to your tank. Before you go out and buy something, try putting a small half gallon plastic bottle filled with sand into the tank instead. The theory is to use less water in the tank but to keep enough for it to flush.

Save on Your Water Bill with Plumbing Upgrade

Sometimes, the littlest changes bring about the biggest results. You can save water around your home by upgrading your plumbing to more efficient fixtures. These quick, easy DIY projects will help cut your water bill and reduce your overall consumption. Happy flushing.

Expert Advice

From cordless flashlights and wet/dry vacuums to caulk cutting saws and right-angle wrenches, our expert staff is always on hand to help find the right equipment for your next DIY plumbing project. Need to know how to replace a faucet? Our blog, Two Quick and Easy In-Home Plumbing Repairs, has helpful tips that will make the installation a breeze. As always, if you have any questions about what to choose, pricing or how-to’s, don’t hesitate to contact us. Stop by our store — we’re open seven days a week.

Categories: DIY Projects, How-To's, Restore and Renovate, spring checklist | Leave a comment

Get a Jump on New Year Cleaning with These Tips

Get a Jump on New Year Cleaning with These TipsThe company has gone and your home is settling back into its regular routine. While straightening up after your guests, get a jump start on your New Year cleaning. This is the perfect time to deal with the things you noticed during the holidays but had no time to address. If the snow and cold weather is keeping you inside, put your time to good use and tackle some.

Basic Cleaning After the Holidays:

  • Carpet – Spot shampoo the heaviest soiled areas in your home. Save a full room cleaning for the Spring when floors can dry out completely.
  • Oven – Now that the cooking is done, give the oven and stove top a thorough scrubbing.
  • Kitchen – Steam clean your tile floors in kitchens to get up ground in food from grout.
  • Refrigerator– Take out leftovers and wipe down shelves and drawers.
  • Bathrooms – Scrub showers, tubs and sinks. Use a brush to clean tile grout. Clean the drains of hair and soap scum.
  • Front door – Replace your holiday wreath with one that’s appropriate until Spring. Colorful berries, foliage or chrysanthemums are favorite choices.

Declutter by Donating

Like many of us, collecting more things than we actually use is a stifling habit. The New Year is the perfect time to rectify that. Declutter your home by donating things that have overstayed their welcome. Many charities can put them to good use.

Items to Purge Following the Holidays:

  • Clothing – Go through your closets and get rid of clothes you seldom wear.
  • Bed linens and blankets – Inspect your sheets, blankets and towels for wear and donate.
  • Throw rugs – Local branches of the Humane Society appreciate old rugs for their rescue animals.
  • Plastic containers – Recycle the ones with no lids or that are stained. Once a year, purge your total collection by half.
  • Christmas decorations – Before you pack them back up, donate the ones you rarely use.
  • Kitchen appliances – If you received newer versions for Christmas, give away the old ones.
  • Old Christmas cards – Add the names and addresses to your contacts and recycle the cards. Keep only those with special meaning.

Time to Map Out Your 2017 Plans

While your mind is focused on cleaning, decide what your next DIY projects will be. Add them to your calendar as a reminder of the things you wish to accomplish in the New Year. Give yourself time to research how to do the projects and the best materials to use. Then keep an eye out for sales long before you need them.

Here’s to Bigger and Bolder DIY Projects in the New Year!

The New Year brings lots of promise for great things ahead. By cleaning out the old and welcoming in the new, we continue to grow and enrich our lives. Challenge yourself in 2017 to attempt bigger and bolder DIY projects around your home. You’ll be glad you did.

Expert Advice

From vacuums and carpet cleaners to steam cleaners and floor polishers, our expert staff is always on hand to help find the right cleaning equipment to make your New Year bright and shiny. Want more tips on how to declutter your home? Our blog, Post Holiday Clean Up – 7 Ways to Bring It On, is full of information to help tackle all your unwanted stuff. As always, if you have any questions about what to choose, pricing or how-to’s, don’t hesitate to contact us. Stop by our store — we’re open seven days a week.

Categories: How-To's, Restore and Renovate | Tags: , , , , , , , , , , | Leave a comment

Plan Your Way to a Successful Holiday Gathering

Plan Your Way to a Successful Holiday GatheringChristmas is getting awfully close and panic has set in. If you are wondering how you’ll feed all your guests coming for Christmas dinner, worry not. With a little pre-planning, this holiday gathering promises to be a total success.

Schedule Your To-do List

Use your calendar to determine when to schedule items on your to-do list. Map out when to grocery shop, set the table and when to start cooking. Avoid burn-out by accomplishing several items each day. If you did a thorough cleaning of your kitchen prior to Thanksgiving, you are ahead of the game and only need to spot clean now. Do last minute touch ups like vacuuming and bathroom cleanups on the day before the event.

Be a Stress-Free Chef

Pre-planning is key to pulling off a less stressful holiday meal. Don’t leave cooking until the last minute. Here are some suggestions of things to do ahead of time:

  • Plan your menu – Keep it simple. Don’t try to cook everyone’s favorites. Have the main course and a few sides. If guests insist on helping invite them to bring their favorite dishes. Extra ice is always needed.
  • Generate a shopping list – By planning the meal, appetizers and beverages ahead, you know exactly what to get from the grocery store, which minimizes overspending.
  • Keep a stocked pantry – Having staples on hand during the holiday season keeps you from constantly running to the store. Many of these items go on sale for the holidays, so stock up.
  • Cook ahead – By mixing, chopping or cooking portions of a recipe a few days ahead, you can quickly combine them to finish the dish. Try to leave only a few dishes to prepare the day of the event.
  • Set the table – Table cloths, napkins and silverware can be put out days earlier but keep the plates and glasses until closer to the date. Have your serving pieces washed and ready for use.
  • Rearrange furniture – Open space for people to mingle and have conversations.
  • Rent extra tables and chairs – Give your guests ample seating for the big event.
  • Fire up the heaters – Don’t let outdoor spaces go unused. Rent propane heaters to increase overflow space.

Prepare for Controlled Christmas Chaos

If you don’t leave too many things to finish last minute, you can enjoy the joyful chaos of Christmas Day. Go over your checklist the day before to see if anything has been left undone. Let your Christmas helpers attend to these often-overlooked items:

  • Parking – Make sure you let your guests know where to park. Clear your driveways and sidewalks of snow. Salt or put sand down to avoid falls. If raining, have extra umbrellas handy.
  • Lighting – If your festivities are at night, put out additional outdoor lighting to help guide your guests.
  • Pets – Depending on how your animal responds to strangers, you may want to put them in a quiet room to celebrate in peace. Don’t forget to treat them to some holiday cheer with treats or a new toy.

Get Organized Early – There’s Still Time

By planning ahead, you can make your holiday gathering enjoyable for family and guests (while less stressful for you). There’s still time to get organized. This holiday have a smile on your face and a beverage in your hand as you greet your company. Your family may not recognize this relaxed version of you!

Expert Advice

From banquet tables and folding chairs to portable heaters and generators, our expert staff is always on hand to help you throw the best holiday gathering ever. Need to thoroughly clean your kitchen for the holidays? Our blog, Pre-Holiday Cleaning Tips for the Kitchen, will get you ready for the big day. As always, if you have any questions about pricing or how-to’s, don’t hesitate to contact us. Stop by our store — we’re open seven days a week.

Categories: How-To's, Restore and Renovate | Tags: , , , , , , | Leave a comment

Tried and True Interior Decorating Tips

Tried and True Interior Decorating TipsAre you envious of the interior designers on television and how easily they take a room from dull to dazzling? Never fear, by following a few tried and true design rules, you too can make your home décor stand out. Now roll up your sleeves, we have work to do.

5 Ways to Decorate Like a Pro

  1. Choose a color palette – Decide on the colors you want to feature throughout your house. Next, review each room to see how to best utilize your chosen color scheme in that space and formulate a plan.
  2. Create a focal point – When you walk into a room what catches your eye? It could be anything – a fireplace, artwork or an area rug. Use this item as your centerpiece and create your design around it.
  3. Assess your room’s lighting – Install different fixtures around a room like recessed ceiling lights, spotlights and under cabinet puck lights, which add warmth and showcase your décor.
  4. Add interest to a room – Not everything needs to be matchy matchy. Use a variety of different textures and shades from your color scheme to paint the walls and furnish the room. Look for interesting ways to arrange your furniture.
  5. Use paint to stage a room – Don’t be afraid to add a pop of color to help display artwork or photographs on an accent wall. Painting the inside of a bookcase will help it stand out and not blend in. Paint the ceiling, crown molding, even floors a variation of wall color or a complimentary color.

Reinvigorate Your Kitchen with a New Backsplash

If you want to reinvigorate your kitchen without totally remodeling, consider installing a new backsplash. Use inexpensive tin ceiling tiles, wooden bead board, wallpaper, stainless steel, chalkboard or magnetic paint to give the busiest room in the house a new look.

Ready to get those tools out?

Here are some easy decorating ideas for you to try:

  • Install a new bathroom faucet
  • Change the hardware on kitchen cabinets
  • Add a chair rail or wainscoting to a room
  • Hang a chandelier in your laundry room
  • Install crown molding
  • Use wallpaper on an accent wall
  • Turn a closet into a home office or craft space

Before Buying, Repurpose Old Stuff

Unless you just prefer to start from scratch with new furnishings, find creative ways to repurpose items you already have. An old armoire can double as a china cabinet once you remove the doors and add glass shelves. A dresser can be turned into a bathroom vanity by mounting a sink on top. Build a new headboard using old doors, shutters or wooden fencing to create a one-of-a-kind bed.

Stay Focused and Express Your Style

Interior decorating is about expressing your style. As a DIYer, you have the added advantage of cutting out the middle man (the contractor) and doing the work yourself, thus saving money. Come up with a plan of attack and work on one room at a time. Write down your design goals to help you stay focused. Forget those TV experts, you have the best designer working on your house already – you.

Expert Advice

From circular saws and drills to nail guns and paint sprayers, our expert staff is always on hand to help with your next DIY home decorating project. Still wondering if painting will make a difference? Our blog, Give New Life to Your Walls with a Quick and Easy Paint Job, will convince you to get the roller and brushes out. As always, if you have any questions about pricing or how-to’s, don’t hesitate to contact us. Stop by our store — we’re open seven days a week.

Categories: DIY Projects, Fall Checklist, How-To's, Restore and Renovate | Tags: , , , , , , , , , , | 1 Comment

Seasons Change and So Should Your Filters

Seasons Change and So Should Your FiltersBefore settling in for a long winter, consider improving your home’s air and water quality by changing the filters throughout the house. A study by the Environmental Protection Agency (EPA) says the average person spends nearly 87% of their life indoors and that the air inside our homes is often worse than the air outside. We are exposed to higher concentrations of airborne pollutants including cold and flu viruses in our home than anywhere else.

Harmful Allergens Lurk in Your Household Dust

Household dust can contain everything from lead and formaldehyde to allergens like dust mites, pollen, mold and pet dander. Children and the elderly are especially sensitive to poor indoor air quality, which is why keeping filters clean is so important.

Here are 9 filters you should check and/or change before cold weather arrives: 

  • Furnace – Proper filter replacement can help keep it working properly. When removing a filter on an old system, note the direction it was installed. Some only work when placed with the airflow going one way.
  • HVAC – Central air and heat systems need to have the filters changed every 3 months and if you have pets, every 2 months.
  • Dryer – Clean the filter after every load. Once a year have the hose running from the dryer to the exterior wall vacuumed to prevent buildup and fire hazards.
  • Humidifier – Some heating systems have them attached so you may want a professional to service them. For free-standing humidifiers, frequently clean the unit and replace the filter to avoid mold and bacteria growing. A healthy humidity level in a home is between 30-50%.
  • HRV (Heat Recovery Ventilation) – Newer, energy efficient homes have air exchange systems that use warm indoor air to heat fresh colder air. Since contaminants can be recirculated back into the home keeping the filter changed is key.
  • AC Housing – The grill on an outdoor unit serves to keep air flowing inward and heat dissipating. Keeping it free of leaves and debris allows your system to run smoothly.
  • Water Filters – Water purifying systems have a sensor to tell you when the filter needs to be changed but we often ignore it. Change this twice a year to keep mold and bacteria from building up.
  • Refrigerator Water/Ice Maker – Just like the purifying system on the kitchen sink, the water filter on the refrigerator gets overlooked until the ice or water develops an odor or tastes bad. Letting your filter go too long can result in costly repairs or replacement.
  • Range Hood – Made of stainless steel, these filters collect grease and food particles from cooking. Scrubbing with warm soapy water and baking soda routinely will keep grime from building up on your fan motor.

Clogged filters can cause:

  • appliances to operate inefficiently.
  • AC cooling coils to freeze from lack of airflow.
  • heating and cooling costs to rise.
  • unhealthy air to be re-circulated throughout home.
  • HVAC systems to fail resulting in costly repairs.

Breathe Easier by Replacing Your Filters

By replacing your air and water filters, your home will be healthier and operating at maximum efficiency. Set a reminder on your phone to help you keep track of when to change them out. Remember to date the new filters before installing. Don’t let replacing an inexpensive filter cost you hundreds of dollars in repairs. Change is a good thing.

Expert Advice

From dehumidifiers and air scrubbers to ladders and vacuums, our expert staff is always on hand to help you keep your home comfortable and safe. Want to stay warm this Winter? Our blog, Need Hot Water/ Heat – Best Practices for Maintaining Your Systems, has tips for helping you stay toasty when cold weather arrives. As always, if you have any questions about pricing or how-to’s, don’t hesitate to contact us. Stop by our store — we’re open seven days a week.

Categories: DIY Projects, How-To's, Restore and Renovate | Tags: , , , , | Leave a comment

Change Up Décor for Winter in 5 Simple Steps

Change Up Décor for Winter in 5 Simple StepsAre you ready to change the interior design in your home? If you want to mix things up (and don’t want to break the bank) consider doing small tweaks to your existing style. Many people like to change their décor with the seasons or the holidays so if you want to try something different, we’re here to help.

1. Let Your Fireplace be the Focus

Switching out your décor is simple. Decide which rooms you want to change and focus on how you want to convey the Winter season. One way to change the design is through the furniture layout. Grouping your chairs and sofa around a fireplace communicates a cozy relaxed feeling. Before you start moving furniture, remember to save your back and use a dolly for the heavy items.

2. Introduce Seasonal Colors into Your Design

Bring the colors of the season into your design. Fall colors of golden yellow, burnt orange and rich forest green are all great options. Want more of a change? Work Winter hues of white, gray and steel blue into your existing décor by adding pillows, throws and rugs. If your original couch color is not working with your new design direction, buy a slipcover.

3. Bring on the Warm and Fuzzy

Creating a cozy atmosphere is the main decorating theme for Winter. Colder temperatures make you want to curl up in bed with a good book. Think layers and textured for you new additions. Here are a few suggestions for how to make your bedroom more warm and fuzzy:

  • Switch out linens – go for soft cottons or flannel
  • Layer your blankets and quilts – plush, fur lined throws are perfect for keeping the chill away.
  • Add some colorful pillows – Pops of color keep things interesting.
  • Place new rugs around – Try layering rugs over your hardwood floors to provide warmth and interest.
  • Hang new drapes – Choose thicker fabric to help insulate the windows. You can hang them over the existing shades or sheers.
  • Include seasonal scents – Cinnamon, evergreen, or apple spice are all smells we associate with the Fall and Winter months. Burn candles or use essential oils in a humidifier.

4. Don’t Leave Out the Bathroom

The bathroom is one of the easiest to redecorate. Change out the towels, rugs and shower curtain and voilà, you have a whole new look. Lay out scented soaps and body washes for guests to use. A new soap dish, trash can and laundry hamper can help tie the look together. If you don’t want to buy new ones, try spray painting your existing ones to coordinate.

5. Cozy Up to Your Winter Décor

Soon the chilly temperatures will have us staying inside more and more. Why not freshen up your living space by changing your décor. It is an easy, inexpensive way to breathe life into a tired design and it’s fun, too. Break out of your rut and get cozy with your Winter décor.

Expert Advice

From drills and air nailers to ladders and dollies, our expert staff is always on hand to help you accomplish your home decorating ideas. Want to focus on sprucing up the house for the holidays? There are some great ideas in our blog, 9 DIY Projects That Inspire Holiday Decorating and Entertaining, to help get you into the spirit of the season. As always, if you have any questions about pricing or how-to’s, don’t hesitate to contact us. Stop by our store — we’re open seven days a week.

Categories: DIY Projects, How-To's, Restore and Renovate | Tags: , , , , , | 1 Comment

Give Them What They Want – The Best Gifts for Your DIYer

Every Christmas, you struggle to figure out what to buy the DIYer in your family. Worry no more. Give them something you know they will use! We’ve come up with a few suggestions that can help you select the right present.

Gifts Your Gardener Will Dig

If you know someone who loves to work in the yard, give them a gift that will have them counting the days until Spring. These tools will lessen the toil and free up their time to actually stop and smell the roses.

Give Them What They Want – The Best Gifts for Your DIYer

Gifts That Make Home DIY Jobs Easier

Is your DIYer planning to do some work inside the house this winter? Gift them with tools that make the job easier. Even small items like paint brushes, roller refills and various sizes of sand paper will not go unused.

  • Cordless drills and screwdrivers
  • Compact flood lights
  • Voltage tester with flashlight
  • Cordless table saw
  • Hydraulic driver
  • Air inflator
  • Drill bit set

Gifts for Winter Outdoor Projects

Cleaning sidewalks and driveways during the winter is a tough job. Your DIYer will appreciate having the right equipment on hand during the next big storm.

Top Honda Christmas Gift Ideas

Gifts for Stuffing in DIYers’ Stockings

Already have your gift and need some stocking stuffer suggestions? Ask us about ordering these stuffers that so ingenious, you might want to order one for yourself!

  • Stanley 4-in-1 pocket screwdriver – The size of a Sharpie pen, this is a great tool to keep in the kitchen or the glove compartment of the car.
  • Portable knife sharpener – Find one that accommodates different types and sizes of blades (steel, ceramic). Most are compact and can be stashed away easily.
  • MagnoGrip magnetic wristband – Getting up on a ladder and realizing you left the nails elsewhere is the worst! This handy invention wraps around your wrist and holds nails, drill bits, or whatever you might need.
  • Sanding sticks – Crafters and DIYers will appreciate these handy pencil thin sanding sticks to work on those hard to reach areas.

DIYers Love Tools and Gadgets for Christmas

DIYers love practical gifts like tools and gadgets because it shows you understand what makes them happy. So, set your little handyman or woman loose in their workshops to play with their special toys. You can relax and picture how great your home will look once they get finished with their projects.

Expert Advice

From circular saws and miter saws to drills and air nailers, our expert staff is always on hand to help you find the right tool for your DIYer. Are you just starting out as a DIYer? Our blog, Plan Out Your DIY Projects with These 5 Essential Tools, explains the basic equipment that will help you tackle any job. As always, if you have any questions about pricing or how-to’s, don’t hesitate to contact us. Stop by our store — we’re open seven days a week.

Categories: Choosing Equipment, Featured Products | Tags: , , , , , , , , , , , , , | Leave a comment

Don’t Be Left in the Dark – Replace Light Bulbs and Batteries

Don’t Be Left in the Dark – Replace Light Bulbs and BatteriesMany of us don’t remember to replace light bulbs or batteries until we find ourselves stumbling around in the dark or waking to the mysterious beeps of a smoke alarm at 3 am. Getting into the practice of checking and replacing them at certain times of the year will help you avoid these unfortunate surprises. Lots of people use daylight saving time as a reminder. “Fall Back” and “Spring Forward” also signal a check of batteries and light bulbs around the house. Others use the change of seasons as a prompt for a light and battery check four times a year.

Light Bulb 101

Picking the right light bulb is a science these days. Incandescent bulbs (like the one Edison introduced) used to be the only choice. Now, we have CDLs (compact fluorescent lights) and LEDs (light emitting diodes). Which one should you buy? Don’t focus on the type of bulb (they are all energy efficient) but rather the lumens it emits. The higher the lumens the brighter the bulb. Here’s a handy chart to use when selecting a light bulb:

  • 40 watts – 450 lumens
  • 60 watts – 800 lumens
  • 75 watts – 1100 lumens
  • 100 watts – 1600 lumens

Well Lit Means Well Protected

Keep your house properly lit inside and out to provide a high level of security. Look around your home for the light bulbs that need to be replaced. This list will get you started on your search:

  • Appliances – Check the refrigerator, oven and microwave.
  • Front door – Add a dawn to dusk fixture to keep the bulb from burning out so often.
  • Flood lights – Inspect areas around the perimeter of the house where you don’t frequent.
  • Driveway and walkways – If you have individual lights lining the walkways or driveway, check for ones that have burned out.
  • Garage light – If you get home before dark, you may not know it is out. 

Be Sure to Check Your Smoke and CO2 Detectors

Batteries, like light bulbs, are usually forgotten until needed. With winter weather approaching it is a good time to check your home’s batteries to make sure everything is in working order. Some important items like lifesaving smoke and CO2 detectors often go unnoticed so check them twice a year.

Check and replace these batteries:

  • Flashlights
  • Smoke and CO2 detectors
  • Security systems
  • Car battery
  • Storm weather radios

Check Your Security System’s Battery

You may not realize that your security system has a back-up battery. Because these batteries are built to last, you may never have replaced it. Consult your owner’s manual to see how to check its power status, what type of battery your system uses and how to install it. Storm outages can drain them so make sure to check them to stay secure this winter.

Keep Those Flashlights Ready

While we are on the topic of storms, it is always a good idea for flashlights and storm radios to be charged. A battery-operated alarm clock comes in handy when overnight storms knock out the power. If power is out for a while your cell phone battery may give out, too. Consider keeping a charged battery pack or solar powered charger available.

Tired of Being in the Dark? Get a Portable Generator

If being without of power is something you experience every Winter, consider buying a portable generator. They come in a variety of sizes so decide what appliances you want to keep running (refrigerator, stove, heater) to help you pick. There are UPS (uninterrupted power supplies) for your electronics that will help you stay connected and protect them from power surges when electricity comes back on.

Stay Safe – Replace Light Bulbs and Batteries

Don’t get left in the dark. Take the time to check and replace light bulbs and batteries around your home. These little tasks can help keep you safe and protected all year long.

Expert Advice

From drills and ladders to portable generators and floor jacks, our expert staff is always on hand to help you secure your home and car for whatever Winter throws at them. Want more tips on getting ready for cold weather? Our blog, 4 Cold Weather Basics: Winter Storm Emergencies Pt. 4, has helpful information on what to do during severe weather. As always, if you have any questions about pricing or how-to’s, don’t hesitate to contact us. Stop by our store — we’re open seven days a week.

Categories: DIY Projects, How-To's, Restore and Renovate | Tags: , , , , , , , | Leave a comment

Outdoor Winter Preparations – Don’t Let Old Man Winter Catch You Napping

Outdoor Winter Preparations – Don’t Let Old Man Winter Catch You NappingIt seems like Fall is getting shorter and shorter every year, so take advantage of the weather while you can and get a few items checked off your Winter prep list. Making sure your home and yard are properly prepared for cold temperatures will give you peace of mind later.

Goodbye Garden

It’s sad when we say goodbye to our gardens but prudent preparations now will make things a lot easier come Spring. Winter can wreak havoc on your outdoor space so store items now that can be affected by freezing temperatures. Here are a few things to add to your to-do list:

  • Trim trees and shrubs
  • Aerate your grass
  • Till garden beds
  • Compost leaves
  • Clean soil out of flower pots and store them
  • Dig up bulbs, place in dry place
  • Divide your perennials
  • Winterize garden power tools
  • Store clean rakes, hoes, trimmers

Think Compost Bin This Year

Make this year the one where you start a compost bin. They are easy to build and you will reap lots of rewards from the black gold it generates. If you want to learn more about composting, check out our blog, 10 Good Sense Tips for Building a Compost Bin, and find out how it can help your garden and the environment.

Prepare Outside Your Home for Dropping Temperatures

Cold weather likes to remind us of the little things we forget to address before the needle drops – like water spigots and hot tubs. List all the small stuff outside that needs to be readied before Old Man Winter arrives – and get ‘re done. We’ve listed a few items to get you started.

  • Pressure wash and store lawn furniture
  • Cover outside water faucets
  • Inspect and clean your gutters
  • Winterize outdoor sprinkler systems, pools and hot tubs
  • Cover or remove window A/C units
  • Put up storm doors and windows
  • Have HVAC system serviced
  • Drain and store garden hoses
  • Inspect driveway for crack and seal
  • Remove wind chimes, yard art and flags that can be damaged in storms
  • Winterize hot tub

Start Winterizing Your Garden and Home Now

Avoid the problems cold temperatures bring by preparing for harsh Winter weather now. A list of DIY projects to do this Fall is an easy way to make sure things get accomplished. By winterizing your garden and the outside of your home, you are protecting them and saving yourself from costly repairs. It’s a win-win for a DIYer like you.

Expert Advice

From rakes and ladders to pressure washers and tillers, our expert staff is always on hand to help you get ready for the cold weather. Not sure what else you need to do to close out your garden?

Our blog, Fall Checklist Pt. 1: Garden Clean Up – Winterization, has tips on making sure your perennials survive until Spring. As always, if you have any questions about pricing or how-to’s, don’t hesitate to contact us. Stop by our store — we’re open seven days a week.

Categories: DIY Projects, Fall Checklist, Gardening and Lawn Care, How-To's, Restore and Renovate | Tags: , , , , , , , | Leave a comment

Pre-Holiday Cleaning Tips for the Kitchen

Pre-Holiday Cleaning Tips for the KitchenIn the coming weeks, your kitchen is going to get a real workout. Before your holiday cooking marathon begins, take time to give it a thorough cleaning so you can focus on what’s important – family and friends.

The Big Chill Gets a Big Purge

First thing on the agenda is cleaning out the refrigerator. Make room for your holiday dishes by purging expired containers and leftovers. Wipe the shelves with soapy water and add a new box of baking soda. Clean the condenser coils on the back of the refrigerator to help it run more efficiently. First, turn the power off before pulling it out (be careful not to disconnect the water line from the ice maker). Vacuum the dust off the coils, then slide it back and turn the power back on. Wipe down the front, sides and top of your refrigerator to finish.

A Clean Oven is a Happy Oven

You are about to use your oven non-stop. Starting with a clean one will make final clean-up easier – plus it will likely run more efficiently, too. Clean the inside of the oven by using the self-cleaning feature or by using a little elbow grease. Wipe down the wire racks as well as the outside. Depending on the kind of stovetop you have, clean out the burners or polish the cooking surface.

Stuff to Help Your Kitchen Clean-up Shine 

  • Donate mismatched dishes and glassware – A beautifully set table will impress your guests.
  • Get rid of old appliances – If your toaster oven has seen better days, now is the time get a new one.
  • Dust ceiling fans and light fixtures – Clean the ceiling fan blades by using an old pillow case. Put the blade inside the case to catch the dirt. Use a ladder when vacuuming light fixtures.
  • Clean the microwave – Put a bowl of water with lemon slices inside to heat for 3 minutes. The steam will loosen food particles and the lemons get rid of odors.
  • Restock the pantry – Don’t wait until you start cooking to find you are missing something. Take an inventory to see what you need. Replace anything that looks old or has an expired freshness date.
  • Sharpen your knives – Have a professional do this or purchase a whetstone and learn how.
  • Round up serving utensils – Do you have what you need? Purchase any ladles, slotted spoons, tongs or cake servers you might need. Don’t forget a wine opener.
  • Check the fire extinguisher – Accidents do happen so be prepared. Make sure you have a first aid kit handy. Are your smoke and CO2 detectors working properly?
  • Polish the silver – If you are planning to use Grandma’s silverware, wash and polish the pieces ahead of time.
  • Childproof your home – Are you expecting small children to be at your house over the holidays? Look for any potential trouble spots in the kitchen and your home. Safety plugs and bumpers for sharp corners are always helpful.
  • Clean trash cans – A big dinner creates a lot of garbage so disinfect your cans ahead of time and have a stash of extra bags ready for the event.

Check the Dishwasher Drain and Door Seals

There is no good time to discover that the dishwasher leaks but with a little preventative maintenance you can keep your holidays dry. Check the drain for any food that might clog it. Clean the door gasket and check to see if the seals have deteriorated. Fill the detergent cup with white vinegar and run a cycle to clean the inside.

Create a Bright, Shiny Work Space for the Holidays

Giving your kitchen a massive cleaning before the holidays might seem counterproductive since it is going to get messed up anyway. There is a method to our madness. Going into this busy time with a bright and shiny work space allows you to focus on your recipes and your company. A spotless, fully stocked kitchen is less stressful for you and makes cleaning up after guests leave a lot easier. So, scrub now, relax later. Happy Holidays!

Expert Advice

From ladders and vacuums to banquet tables and folding chairs, our expert staff is always on hand to help with your holiday preparations. Worried about how to put your house back together after everyone leaves? Our blog, Turn Post Holiday Clean-up into a Fresh Start for Your Home, is the perfect game plan for the New Year. As always, if you have any questions about pricing or how-to’s, don’t hesitate to contact us. Stop by our store — we’re open seven days a week.

Categories: DIY Projects, How-To's, Restore and Renovate | Tags: , , , , , , , , , | 1 Comment

Pre-Holiday Cleaning Doesn’t Have to Be a Chore

Cleaning for the Holidays Doesn't Have to be a ChoreGetting ready for the holidays can be chaotic but we’re here to help you hold onto your sanity. Don’t get overwhelmed, get prepared. Pre-holiday cleaning doesn’t have to be a chore if you develop a game plan and stick to it. You’ll be surprised at how quickly you will check things off your list.

Divide and Conquer Your Tasks

Your first order of business is to stop procrastinating. By spreading the tasks out over a week, you won’t wear yourself out before the guests arrive. Do a walk-through of your home, find everything you’d like to get accomplished and list them in the order of importance. Be realistic with the time you have or you may not get through the entire list.

Round Up Your Elves to Help

Some items can be done several weeks ahead like cleaning carpets, washing windows or having your air vents and ducts vacuumed out. Recruit helpers for these larger jobs. Round up the elves in your family to help move furniture and vacuum or hang decorations.

Start with the Kitchen

Everyone congregates in the kitchen during the holidays, so start your cleaning there. Remove and store unused small appliances (waffle irons, toaster ovens, blenders) so you will have room for serving trays and platters. Give larger appliances a thorough cleaning and wipe down your cabinets. Don’t forget to clean out the refrigerator to make room for the food you are preparing.

Clean, Don’t Stress

Hit the basics first and then move on to smaller jobs if you have time. The point of a pre-holiday cleaning is to get your house ready for company but not to stress you out. Here is a short list of some of the essential items to focus on.

Pre-Holiday Cleaning Checklist:

  • Dust from the top down – Vacuum the cob webs from ceiling fans and light fixtures first and then dust from the tops of book shelves and cabinets, working your way down. Finish one room before moving onto the next.
  • Deep clean bathrooms – Give it a good scrubbing so you only need to touch it up before the big day. Put out fresh guest towels and soap. A basket of toiletries (toothbrushes, mouthwash and hand cream) is also a nice touch.
  • Straighten bedrooms – De-clutter the room and add fresh linens to beds. Give guests room in the closet to hang up clothes.
  • Clean or polish the dining room table – Have clean dinnerware, glassware and table linens ready and waiting. Set the table when you are closer to the event.
  • Stage your entryway – Make your front doorway welcoming by cleaning your door and stoop, adding holiday decorations and replacing worn out a welcome mat with a new one.

Plan to Touch Up

Focus on the rooms that will be used the most. Once you clean a room, don’t fence it off from use. Come back and touch it up if needed. (Elves have a way of keeping it clean if they know they must help re-clean it). Make a rundown sheet to help you remember.

Last Minute Items to Cover:

  • Vacuum high traffic areas.
  • Mop kitchen floor.
  • Clean toilets and sinks.
  • Take out trash and add fresh liners.
  • Put out fresh throw rugs.
  • Add fresh flowers or burn holiday scented candles.

Your Company Will Appreciate Your Efforts

Remember, even though you want your house to be in tip top shape, the holidays are a time to get together and have fun. Formulate a pre-holiday cleaning plan and stick to it. Your company will appreciate your efforts but they are coming to see you, not inspect the baseboards. As the saying goes, don’t sweat the small stuff.

Expert Advice

From banquet tables and folding chairs to portable heaters and generators, our expert staff is always on hand to help with your holiday party plans. Looking for ways to make your home more festive this season? Our blog, 9 DIY Projects That Inspire Holiday Decorating & Entertaining, is sure to fire up your creative juices. As always, if you have any questions about pricing or how-to’s, don’t hesitate to contact us. Stop by our store — we’re open seven days a week.

Categories: How-To's, Restore and Renovate | Tags: , , , , , , , , , , | Leave a comment

Let a Lighting Makeover Bring Your Décor into Focus

how to make over an antique light fixtureHow many times have you finished painting a room only to look up and see an outdated light fixture staring back at you? Often overlooked, lighting can make or break a room’s décor. Rather than buying a new chandelier (at a premium cost) challenge yourself to refurbish an antique fixture and install it! It’s easier than you think.

A Thrift Store Treasure Lights the Way

Scour your local thrift or reclaimed hardware stores for the perfect lighting fixture. Once you find the size, shape and material you want, fire up those creative juices and get started. Decide whether you want it to blend with the colors of the room or serve as a focal point by giving it a pop of color.

What You Need for an Antique Light Makeover:

  • Mask and safety goggles – Protect yourself from spray paint mist.
  • Drop clothes –Paint mist gets on everything, so cover furniture, built-ins, etc. left in the room. Cardboard boxes make great paint booths.
  • Spray paint/primer – Apply in a well-ventilated area where there is no dust or moisture. Fans directed away from the spray zone can help dissipate fumes.
  • Painter’s tape
  • Screw driver
  • Wire cutters/strippers
  • Pliers
  • New electrical lighting elements (if needed) – Replace old wiring if worn.

Add Some Bling to Your Refreshed Chandelier

Decide on how you want your light fixture to look. Do you want to add crystals or other decorative items? Do you only want to use some of the elements of the chandelier? Do you want a high gloss or matte finish paint? Let your creativity shine and experiment with the look of your room.

5 Steps for Transforming an Antique Light Fixture

  • Clean the chandelier – The surface needs to be free of dirt, grime and oil for the paint to adhere.
  • Take it apart – Remove the wiring and anything else that isn’t getting painted. Hint – as you take the fixture apart, keep the pieces in the proper order, so you can re-assemble it easily.
  • Tape it – Anything that is not being painted like the light bulb sockets, glass panes or crystals should be covered.
  • Paint – Spray paints are the easiest. Apply 3-5 light coats. Heavier coats will run. Sand lightly between coats, especially if you have drips.
  • Allow time to dry – Humidity and temperature will affect drying time so don’t rush it.

Installation Time!

Turn the power off at the electrical box and remove the old light. If the current receptacle is old, you may need to add a coupler to lengthen the mounting screw enough to accept the new light. Connect the wires. Screw the new fixture into the coupler flush to the ceiling. Be bold and add some industrial style light bulbs to add a new twist.

Get Inspired by Repurposing Old Items

Repurposing old items is about using your imagination in ways that save you money and beautify your home. Look around for inspiration and challenge yourself to take on more creative DIY home projects. Remember, there are no mistakes in artistic repurposing endeavors, only new opportunities.

Expert Advice

From ladders and fans to precision rotary tools and detail sanders, our expert staff is always on hand to help with your next home decorating idea. Ready to tackle more DIY projects? Find new ways to spruce up your abode with our blog, Use Your Home as a Canvas to Express Yourself. As always, if you have any questions about pricing or how-to’s, don’t hesitate to contact us. Stop by our store — we’re open seven days a week.

Categories: DIY Projects, How-To's, Restore and Renovate | Tags: , , , , , , , , | Leave a comment

The Versatile Wooden Pallet – Who Knew You Could Make That?!

how to diy a pallet wine rackAh, the versatile wooden pallet! If you love to re-purpose found items, then you know about these multi-talented platforms. The internet is filled with how-tos on making everything from lawn furniture to dog houses. However, our favorite project is a wine rack with a glass holder on the bottom. It has our DIY name written all over it!

Wooden Pallets Easy to Find

Why buy lumber for your projects when you can repurpose wooden pallets? If you don’t have them on hand, check with your local stores. These shipping platforms are everywhere; you just have to look for them.

Wine Anyone?

Creating a wine rack out of a wooden pallet is easy and inexpensive. The toughest decision is what size to make it. For a small rack that will hold two to three bottles and four average sized stemmed wine glasses, you will only need to use half of a pallet.

8 Easy Steps for Building a Wooden Pallet Wine Rack

  • Cut the pallet – Use the end section for the base and cut it to the height you want. The standard width of a pallet is 40 inches so adjust it to the width you need.
  • Remove extra boards – Take two boards from the discarded portion of the pallet to use at the bottom of the rack. One board will be the bottom of the shelf where the bottles go and the other will separate the shelves.
  • Create spacers – Cut three 1 x 1 pieces to go between the bottom board for the glasses and the bottom of the wine bottle shelf. You need room to slide the glasses on and off the shelf.
  • Sand the boards – Pallet wood is notoriously rough and splintered, so use a 120 grit sandpaper for smoothing and a 220 grit paper to finish.
  • Openings for glasses – Use a jigsaw to make cuts in the bottom board for the glassware stems. Space them about 4 inches apart.
  • Assemble – Make sure your rack is sturdy by reinforcing the wine bottle shelf with an extra board. Use 2-inch nails and 3-inch wood screws to hold the board together.
  • Finishing – Stain the wood or paint it. If you choose to stain, keep in mind that sanding softens the wood and will cause it to soak up a lot of stain. Due to the rough wood, you will need to work the stain into the cracks and crevices with a cloth or brush.
  • Hanging the rack – Mount it directly into your wall studs to support the weight of the bottles and glasses. Add felt bumper pads to the backside to keep it from scuffing your wall if bumped.

Other Projects to Make with Wooden Pallets

  • Outdoor furniture like sofas and chairs
  • Patio dining table
  • Garden potting table
  • Headboard for a bed
  • Vertical wall garden
  • Dog house

Save Money and the Environment by Repurposing

Repurposing old wood from pallets helps keep them out of our landfills and saves you money. They add rustic charm to the home and garden. Stop wishing for new patio furniture or flower containers and start building what you need with wooden pallets. There are so many DIY projects to use these wooden wonders on – your Winter to-do list may stretch into Spring.

Expert Advice

From circular saws and drills to jigsaws and orbital sanders, our expert staff is always on hand to help with your next DIY home project. Still wondering what you can do with the wooden pallets around your house? Check out our previous blog, Summer Garden Update 2 – Garden Boxes Add Pizzazz to Planting, to help get those creative DIY juices flowing. As always, if you have any questions about pricing or how-to’s, don’t hesitate to contact us. Stop by our store — we’re open seven days a week.

Categories: DIY Projects, How-To's, Restore and Renovate | Tags: , , , , , , , , , | Leave a comment

Go Green – Plant a Living Privacy Fence

how and why to plant a privacy hedgeWe’ve all experienced it. The horrible view from our kitchen window staring straight at a neighbor’s hot tub. While they may be nice people, do you really want to intrude on their private time? Go green! Plant your privacy fence rather than building one. We’ve got a few suggestions to help you make it happen.

Hedges Add Interest and Privacy

If you want more privacy or to add interest to your landscape, a privacy hedge is the ticket. A living fence does much more than just shelter you from prying eyes.

A Privacy Hedge:

  • blocks noise coming from the street and neighborhood.
  • acts as a natural windbreak.
  • can be a snow fence, reducing snow build up around your house.
  • turns your garden into a secluded retreat.

Location Dictates Plants to Use

Starting a privacy hedge will take patience. While there are fast growing varieties of trees, shrubs and vines, none will reach the height or thickness you desire quickly. The location of your fence dictates the size and type of trees and shrubs to use.

Avoid Excessive Maintenance

An important consideration is how much time you want to devote to maintaining your hedge. In formal gardens boxwoods and other shrubs need to be regularly groomed to maintain their precise shapes. If this is not for you then select plants that give you the natural shapes you desire.

How to Plant a Privacy Hedge

  • Select the type of tree or shrub that works best for the location – Do you want it to provide a screen all year long (go with an evergreen)? Or do you want it to flower and give you privacy during certain times of the year?
  • Decide on the height – Set up a ladder to help visualize the approximate height of the plants needed. If you want a 6-foot tall fence, then planting a tree that grows 10-15 feet is only going mean more maintenance.
  • Determine the width – If you have limited space, select trees and shrubs that can be planted closer together. Some species need more room for roots to spread in order to thrive.
  • Density – If you want a thick hedge, plant several staggered rows, which will allow them to fill in.
  • Map it out – Don’t eyeball your planting. Mark off a row with paint or wooden stakes and string to keep your hedge straight.
  • Train your plants – Trim the tops and sides a few times a year after they establish. Keep the shape wider at the bottom than the top to allow sunlight to reach lower leaves.

Fast Growing Plants Can Often Be Invasive

There are many popular plants to use in making a privacy hedge. Most will take one or two seasons to fully establish. Be careful when selecting fast growing plants like bamboo and Japanese Barberry. Some varieties are considered invasive and may not be approved for use in your community.

Best Trees and Shrubs for Hedges 

  • Arborvitae
  • Boxwood
  • Flowering Quince
  • Sawara False Cypress
  • Japanese Euonymus
  • Holly
  • Juniper
  • Privet
  • Oleander
  • Variegated False Holly
  • Korean Lilac
  • Hybrid Yew
  • Canadian Hemlock
  • Rose of Sharon

Vines Good Option for Privacy Screens

Use wire fences or screens that serve as supports for vines like Ivy, Clematis or Hops. Privacy hedges can also be used to hide compost bins or those large green power boxes.

Skip the Bland Privacy Fence and Go Green!

A living privacy hedge is a great way to add color and texture to your garden while providing the privacy you crave. Before you get out the post hole digger and invest in a bland white fence, think about the eco-friendlier option. Soon the sight of your Speedo clad neighbor stepping into his hot tub will be a distant memory.

Expert Advice

From wheelbarrows and shovels to trimmers and tillers, our expert staff is always on hand to help with your next DIY home project. Looking for other Fall gardening projects? Our blog, Landscaping Ideas to Create a Fabulous Fall Yard, has some great suggestions for ways to spruce things up around your home. As always, if you have any questions about pricing or how-to’s, don’t hesitate to contact us. Stop by our store — we’re open seven days a week.

Categories: DIY Projects, Fall Checklist, Gardening and Lawn Care, How-To's | Tags: , , , , , , , , , , , | Leave a comment

Protect Your Trees: Learn How & When to Prune

How and When to Prune Your TreesTrees add beauty, interest and much needed shade to your yard. Replacing trees is a big investment, which is why properly pruning and maintaining them is essential. Not sure what kind of trees you have?

Who You Gonna Call? An Arborist, Of Course

An arborist is professionally trained in identifying the species and determining the health of individual trees, in the name of safety -for the trees and for your family. They can diagnose diseases, insect problems and soil health. Consult an arborist to find out what trees are best for your landscape and where to plant them. Many are certified by the International Society of Arboriculture.

5 Reasons to Prune a Tree

  1. To remove dead or diseased branches
  2. To thin the crown, permit new growth and promote better air circulation
  3. To reduce tree height
  4. To remove obstructing lower branches
  5. To shape a tree for aesthetic purposes

There’s a Right Time to Prune Your Trees

Prune your trees during their dormant season (late fall, early winter) to minimize sap loss and stress to the tree. This will reduce the risk of fungus infection and insect infestation.

Helpful Tips on Pruning

  • Know what kind of trees you have – some flowering trees like to issue buds on old growth in the winter and then bloom in early spring. If you prune one of these trees in the winter, you may not have any blossoms come spring.
  • Avoid pruning a newly planted tree – give it time to establish.
  • Prune when the leaves have fallen – it makes it easier to see what needs to be cut.
  • Never cut more than 25% off of your tree at one time.
  • Don’t trim branches near electrical lines – call a professional or the power company.
  • Never cut the top off a tree – this can cause the tree to die. Thin branches out instead. If it is too tall, consider removing the tree completely.

Tree Surgery is … Surgery

Always use clean, sharp tools for pruning; you wouldn’t want anyone cutting on you with a dull blade, right? When removing diseased branches, wipe your cutters with disinfecting wipes between each cut. This will keep disease from spreading as you cut other branches. You can also use a solution of 1-part bleach to 9-parts water and dip the cutters in as you work.

Handy Tools for Pruning

  • Anvil hand pruners – for small branches up to a ½-inch in diameter.
  • Long-handled loppers – for medium sized branches up to 2.5 inches in diameter.
  • Pruning saw – for larger branches, use a pole extender to reach the higher branches.

Where to Cut and Why

If you would like a detailed how-to on pruning techniques, read our blog, Getting Ready for Fall Part 1: Tree Trimming a Seasonal Sport or visit the Arbor Day Foundation’s webpage for more information.

Let a Professional Handle the Tough Stuff

There are times when every DIY’er needs to step back and let a professional take over. If the limbs you want to cut down require the use of a chain saw and a ladder, then maybe this is one of those times. There’s no shame in playing it safe! 

Take Care of Your Trees

Trees are the crowning glory of any yard, so take care of them. At the end of a long day of pruning, sit down in the shade of your trees, relax and remember the words of John Muir (father of our National Parks): Allow nature’s peace to flow into you as sunshine flows into trees.

Congratulations! Another job well done. Now, go hug a tree!

Expert Advice

From tree pruners and chain saws to wood chippers and wheelbarrows our expert staff is always on hand to help with your next DIY gardening project. As always, if you have any questions about pricing or how-to’s, don’t hesitate to contact us. Stop by our store — we’re open seven days a week.

Categories: Fall Checklist, Featured Products, Gardening and Lawn Care, How-To's | Tags: , , , , , , , , , | Leave a comment

Use the Ombré Technique on Accent Walls

How to Paint an Ombre Accent WallThinking of painting an accent wall? Consider trying the ombré painting technique. This easy method of blending similar colors from light to dark adds interest to any room. Get your paint brush ready. It’s time to channel your inner artist!

Keep Your Paint Choices Simple – But Have Fun

Selecting the colors to use is always a tough decision. Keep your choices simple. Pick a main color and two other shades from the same paint sample strip. If you want to be adventurous, try an analogous color scheme where each hue is similar but slightly different. Pick up an artist’s color wheel to help you select the best companion colors (those side by side on the wheel). Select at least three colors – one light, medium and dark.

Supplies You Need

  • 3-inch or 4-inch paint brushes: have several on hand to blend the different sections
  • Paint sprayer: to use for the primer base color
  • Rollers: for the three major segments
  • Paint trays: one for each main color and the colors you mix for blending
  • Bucket of water
  • Sea sponge (optional)
  • Painters tape, drop cloth, paper towels

Make it Easy – Use a Base Paint with Primer

Prep work is key so tape or cover all molding, fixtures and floor. Make sure the wall is clean. Cut down on your workload by selecting a paint that contains primer. Paint the entire wall with the lightest color. You can use a paint sprayer for this step but switch to a roller to paint the different bands. Once dry, mark off three sections leaving a six-inch space in between each area.

5 Steps for Painting an Ombré Accent Wall

  1. Paint each section. The darkest color is on the bottom, the medium shade in the middle and the lightest on top. Blend the colors into the buffer areas but do not completely paint inside the six-inch spaces.
  2. Mix transitional colors. Mix the dark color with the medium color until you get the shade you want. Mix a second color from the medium and light colors.
  3. Add a slow-drying agent. It will give you more time to blend the paint.
  4. Apply mixed colors. Paint the six-inch segment with the dark/medium shade and blend into the other colors. With a clean brush, do the same with the light/medium mix.
  5. Blend. Using a clean, dry brush, continue to blend the different shades on the wall until you get the look you want.

No Mistakes in Art, So Go for It!

There really isn’t a way to mess up this technique. Release your inner artist and play around with your wall. The colors should bleed into each other. If you want, use a damp sponge to thin out and blend the paint further or mix a darker shade to add small dabs of contrast throughout. Remember, this is your masterpiece. Once you’ve mastered the ombré technique, murals and portraits can’t be too far behind.

Expert Advice

From painter sprayers and fans to ladders and nail guns, our expert staff is always on hand to help with your next DIY painting project. Want to know more about how to paint your home?

Our blog, Paint Like a Pro – Tips for Painting Your Ceiling and Walls, will help you get started. As always, if you have any questions about pricing or how-to’s, don’t hesitate to contact us. Stop by our store — we’re open seven days a week.

Categories: DIY Projects, How-To's, Restore and Renovate | Tags: , , , , , , , , | Leave a comment

Runyon Rental – Your Place for Great Honda Power Equipment

eu2000i_lo_tailgate_lr_02-1With fall quickly approaching and forecasters predicting a cold, snowy winter, we thought now might be a good time to remind everyone of the great Honda Power Equipment we have available to rent or purchase. Runyon Rental is proud to be an authorized Honda dealer and service center.

Runyon Has the Honda Power Equipment You Need:

Ranked #1 by Consumers Year After Year – Honda Mowers Rule

Nothing beats a Honda mower for quality and reliability. Durable and fuel efficient, the twin blade design of Honda mowers offer a superior cut and produce finer clippings, which make better mulch. Smaller clippings mean less bagging and who doesn’t love that!

The Honda Self-Propelled Lawn Mower Has Features You Need:

  • Hydrostatic cruise control keeps a constant speed while mowing
  • Roto-stop blade stop system halts the blades without having to cut power to the engine
  • 4-in-1 Versamow system allows you to mulch, bag, discharge and chop leaves without additional tools or attachments.
  • Starts easily and quickly
  • Has a 21 inch cutting width, 7 mow height adjustments and a 2.5-bushel bag capacity.
  • A 5-year warranty

End of the Season Gardens Need Honda Tillers

Now that our gardens are beginning to wind down, it’s time to think about getting the soil ready for next year. With a Honda tiller you can make easy work of tilling up your plants and adding in mulch and compost to leave your soil properly set for the cold temperatures.

Tackle the Toughest Garden Projects

Made from quality materials, these tillers churn even the toughest dirt into rich loamy soil. They are easy to start and with intuitive controls, easy to use. The powerful 4 stroke engine does the work in one pass. Ergonomically designed, Honda tillers won’t wear you out while you tackle the toughest garden projects.

Honda’s Got You Covered with VersAttach

Tired of never having the right tool to use on your yard? Try Honda’s VersAttach System, which offers two powerhead options and six different attachments – edger, line trimmer, blower, hedge trimmer, pruner and cultivator for the ultimate in versatility.

Keep the Lights On with a Honda Generator

Whether it is a powerful thunderstorm or a strong Winter snow storm, being left in the dark is no fun. Be ready with a Honda generator. There is a perfect sized unit for whatever your power needs are.

Some of the features of a Honda generator are:

  • Super quiet – perfect for using next to your RV or camp site, too.
  • Compact & lightweight – less than 29 lbs.
  • Fuel efficient – can run up to 8.1 hrs. on 1 gallon of gas.
  • Inverter – supplies a stable source of power for computers and sensitive appliances.
  • 3 Year warranty
  • Oil Alert – shuts the engine off when oil is low.
  • Can be paralleled – multiple generators can be tethered to supply additional power.

Take on the White Stuff with a Honda Snow Blower

Preparing for Winter weather means getting ready to clear snow off your driveway and walkways. Nothing takes on the white stuff better than a Honda snow blower. The self-propelled auger drive can throw snow up to 33 ft. while clearing a path 20 inches wide. Get your blower just the way you want it – track driven or wheeled, electric start or recoil. With Honda’s reliability, this workhorse will be around for years to come.

Let Us Service Your Honda Equipment

Already own Honda equipment? Then bring your mower or snow blower in to be serviced by our certified Honda technicians. When you are ready, let us winterize your garden gear for you.

Expert Advice

From mowers and tillers to generators and snow blowers, our expert staff is always on hand to help with your equipment needs. Not sure what equipment you need for your Fall DIY to-do list? Check out the other popular pieces of equipment we offer in our blog, Top 10 Most Popular Runyon Equipment Rentals for Fall. As always, if you have any questions about pricing or how-to’s, don’t hesitate to contact us. Stop by our store — we’re open seven days a week.

Categories: Choosing Equipment, Featured Products, Gardening and Lawn Care | Tags: , , , , , , , , , | 1 Comment

What to Remember When Refinishing Your Hardwoods

Refinishing Your Hardwood FloorsRefinishing your hardwoods is a DIY project you need to understand fully before undertaking.

The most important things to remember:

  • It takes time
  • It takes patience
  • It takes elbow grease

Prepare to Succeed

Refinishing your floors isn’t a quick DIY project. It usually takes longer than a weekend, so be prepared to live with dust and fumes for a few days longer. As with any home renovation, patience is key. Doing the right preparations beforehand will help things go smoothly. Using a floor sander (orbital or drum) is tough on the body, so tag team on the sanding.

Know Your Floors

Before sanding your floors, determine if they can be sanded. Because true hardwoods are solid wood, they withstand the loss of the top layer through sanding. Laminates will be ruined if sanded. It is better to just re-seal and buff engineered flooring.

The 4-Step Process

  1. Prepare. Make sure the floors are clean of all dirt and wax. Remove all furniture, seal off doors, vents, outlets and light switches. The object is to control dust from getting out of the room (and there will be a lot of it!).
  2. Sand. Start with 60 grit sandpaper and work your way up to 120 grit for the final sanding. Work in a straight path along a wall in a semi-circular motion. Always keep the sander moving to avoid creating uneven grooves.
  3. Clean Up. Learn to love the vacuum because your diligence in cleaning after each sanding determines if your finish is blemish free. Frequently check the vacuum filter for clogs. Damp mop floor thoroughly when done.
  4. Finish. Work with a brush when applying sealant around the perimeter and a lamb’s wool applicator for the rest of the floor. Overlap the application with the area worked with the brush. Allow 24 hours to dry. Buff and vacuum before applying second coat. Apply stain in the same manner as sealant. Finish with a couple of coats of polyurethane.

Choosing a Floor Sander – Orbital or Drum

One of the biggest decisions you have to make for this project is which type of sander to choose – orbital or drum. Orbital sanders take longer to do the job but are easier to use. Drum sanders are harder on the floors but they get the job done quickly. Both have a mind of their own, so know your skill level when attempting to operate them.

Tips for Successful Refinishing Projects

  • If working on other renovation projects, save refinishing the floors until last.
  • The finish takes longer to dry in humid and rainy weather. Wait for dry weather.
  • Remove adhesive from a previous flooring with glue remover, rather than sanding. It is tough to sand off and can stain wood.
  • Practice with your sander on a sheet of plywood to get consistent with your strokes.
  • Use an edging sander to smooth out sanding swirls around the walls. Hand sand tight spots like corners.
  • Use a hardwood floor attachment on your vacuum to avoid scratching.
  • Allow dust to settle in room before removing plastic sheeting and doing your final cleanup.
  • When using oil based sealant or stain, use a respirator.
  • Odors from polyurethane can linger for a couple of days so leave plastic up over doors if the fumes bother you.

Keep Off My New Hardwood Floors!

Let the floor dry completely before moving furniture back into the room. It’s a good idea to avoid shoes, bare feet and pets getting on them for the first 48 hours. Until then, don a pair of sunglasses, wear your socks and slide around your refinished floor like Tom Cruise in Risky Business. Clothing is entirely up to you!

Expert Advice

From orbital sanders and floor edgers to fans and shop vacuums, our expert staff is always on hand to help with your DIY hardwood refinishing. For even more helpful info to get you started, check out our blog, How to Re-Finish Your Hardwood Floors to Perfection. As always, if you have any questions about pricing or how-to’s, don’t hesitate to contact us. Stop by our store — we’re open seven days a week.

Categories: Choosing Equipment, DIY Projects, Featured Products, How-To's, Restore and Renovate | Tags: , , , , , , , | 1 Comment

Use Your Home as a Canvas to Express Yourself

Ways to Personalize Your HomeIf your home is your castle, shouldn’t it look like yours? When working on home improvement projects, put your personality into the equation. Getting inspired by DIY designers is fine, but in the end, your domain should be a reflection of your tastes. Time to get creative and express yourself!

Reveal Your Personality

Personalizing doesn’t mean putting your monogram on everything. It is a way of communicating your style and interests through design. From the paint colors you choose to the flowers you plant, a home is simply a blank canvas on which to reveal your personality.

5 Ways to Personalize Your Home

Little personal touches inside and out are the best way to make a big statement. Here are just five quick and easy DIY projects to help you do just that.

  1. Display Your Interests: From family photos and vacation souvenirs to hobbies and sports memorabilia, use these items in different and unusual ways. Add them to furniture with upcycling or exhibit them in unexpected places like a garden bench or a flower pot.
  2. Show Your True Colors: Add your favorite shades throughout the house – on pillows, as accent walls or on the front door.
  3. Be Inventive: Why just put up wallpaper when you can stencil a design on your wall. If you love English manor décor a la Downton Abbey, add crown molding and ornamental flourishes to your ceiling for that Victorian feel.
  4. Stage Scenes: Just the way a set designer stages scenery for a movie or a play, you can do the same with your home. Whether it is painting the front door or using colorful plants as accents, create a look for your entrance that gives a warm and inviting feeling.
  5. Re-use, Re-Invent & Re-organize: While personalizing your home, don’t forget to re-purpose old furniture, re-use items and organize spaces in new or more efficient ways. If your family drops everything on their way into the house, look for ways to create a place for coats, book bags and muddy shoes right inside the front door.

Where Do You Start?

No need to feel overwhelmed; consider personalizing your space a work in progress. Start with one area and then move to the next. Here are a few suggestions:

  • Paint Your Front Door: Make a great first impression (and express your style) by reinvigorating the front of your house. Our blog, 10 Ways to Boost Your Home’s Curb Appeal Now, has other ways to make your residence stand out.
  • Landscape: Create a peaceful oasis for you and your family to enjoy. Want to add a water feature to your garden? Read How to Build a Backyard Pond in 10 Simple Steps.
  • Decorate with Color: Start small. Try adding an accent wall in your living room or dining room. Learn how to achieve the look you want here: Paint Like a Pro – Tips for Painting Your Ceilings and Walls.
  • Stencil Artwork and Peel n’ Stick Graphics: These are great alternatives to having paintings or photographs on a wall. Experiment and combine some of each for a one-of-a-kind display.
  • Personalize Your Home Address: Create a display for your house numbers that reflects your favorite pastime like fishing or skiing. Put your wood working skills to the test and customize one just for your house.

Let Your DIY Projects Reflect You

Don’t worry about whether your home looks like those on your favorite home improvement shows or some fancy website. Home is where your heart is, so let your DIY projects reflect what you are passionate about. It’s time to let “you” shine through.

Expert Advice

From circular saws and drills to pressure washers and paint sprayers, our expert staff is always on hand to help with your next DIY home decorating project. As always, if you have any questions about pricing or how-to’s, don’t hesitate to contact us. Stop by our store — we’re open seven days a week.

Categories: DIY Projects, How-To's | Tags: , , , , , , , , | 1 Comment

DIY Garage Door Makeover? Yes, Please!

DIY Faux Garage DoorsWhen you look at your home from the street, do you see any big blank spaces in the curb appeal? If you say the garage door, then you are correct. Our focus is often limited to the front door while the garage door goes unnoticed. Faux garage door windows are easy to do and will complete the overall look of your home.

Why Change the Look of Your Garage Door?

Is your garage door (or doors) solid, white and boring? No need to replace a perfectly good garage door when you can spruce it up with windows that look real from a distance. Here’s what it can do for your home:

  • Boost curb appeal – By adding faux windows and giving it a little charisma, you are toning down that blank space glare from the front of your home.
  • Unify the style of your house – Select window styles that blend well with your type of home – traditional, contemporary or cottage.
  • Get a new view – Pulling into the same old non-descript garage door every day is boring. Adding touches like windows helps you enjoy the curb appeal of your own home.

First Step? Pressure Washing

If you are a fan of carriage door style windows and hinges, there are several ways to create them. One thing they all have in common is that your garage door needs to be clean first. Pressure wash the door to remove any dirt and allow it to dry completely.

How to Create Faux Carriage Windows on Your Garage Door

  1. Paint – This is the most common approach and the least expensive. It is pretty much permanent, so you need to be sure.
  2. Decals – You can order these online for around $100 and many come with hinge details.
  3. Resin – High impact plastic resin can be ordered online and runs between $300-$500. This hard material is screwed onto the garage door.
  4. Professional Repaint – Hiring a professional to paint the windows will cost about $500.

Tape First, Then Paint

If you choose to paint, tape off the sections of the door for the windows. Press the tape firmly to make sure it sticks. Cover the rest of the door with plastic. Use an all-surface enamel and spray or apply the paint to taped sections.

Don’t Forget the Hinges

For the hinges you can either buy real ones and screw them in or paint them on. When painting, use a stencil to keep their look consistent. Go back over the windows and hinges (if painted) with a clear sealant to help them last longer. 

Just Stick It

Decals are easy to find online and easy to use, just peel and stick. A set for a two-car garage will cost around $100. Use outdoor adhesive vinyl if you want to permanently apply them and to have them hold up under the blistering sun. A coat of sealant keeps the color from fading.

Simple DIY Project with Big Results

From the street, it is very hard to discern if the windows are real or not. You will be amazed at how something so simple ties the look of your house together and boosts your curb appeal even higher. Check another project off your to-do list!

Expert Advice

From circular saws and drills to pressure washers and paint sprayers, our expert staff is always on hand to help with your next DIY home improvement project. Looking for suggestions on other ways to boost your home’s curb appeal? Our blog, DIY Projects That Boost the Value of Your Home, has great tips on what to tackle next. As always, if you have any questions about pricing or how-to’s, don’t hesitate to contact us. Stop by our store — we’re open seven days a week.

Categories: DIY Projects, How-To's, Restore and Renovate | Tags: , , , , , , , , | Leave a comment

Get Creative with DIY Home Address Displays

First impressions are lasting, so make your home’s appearance stand out from all the rest by creating a unique DIY address display. It’s an opportunity to add a little personality and color to the front of your house while marking it with important information. Time to get creative!

House Numbers That Express Personality

Even in this time of the GPS, having your house number prominently displayed is how everyone from the post office and fire department to the kid who delivers the newspaper (you remember those) finds you. Traditionally located on or near the front door, today house numbers are displayed everywhere from planters to flag poles. They’ve evolved into personal expressions.

Why Display House Numbers?

  • Identification – They make it easy for the people to find your home (especially police and fire/rescue).
  • Requirement – Some homeowner’s associations require house numbers be displayed on a certain area of the property (but that doesn’t mean they have to be boring!)
  • Self-Expression – Show off your family’s interests or tastes with house numbers done in your team’s colors or favorite activities.
  • Creative Statement – Many of us enjoy working on crafts so use your talents to make a unique display.
  • Finishing Touches – House numbers that match the style of your home (contemporary, craftsman, cottage) are small finishing touches that complete the look.

Sketch Out Ideas First

Think of the front of your home as a blank canvas, what do you want to show the world? Take a photo of your front entrance and use your computer’s drawing program to sketch out your ideas. Maybe you want to add colorful accents or try out different locations for your house numbers, this will help you experiment.

8 Ideas for Creative House Number Displays

  1. Rustic wooden display – Use recycled boards from wood pallets as the backdrop for your numbers.
  2. Flower pots – Create a row of colorful flower pots with one house number stenciled on each. You can add live or silk flowers to them.
  3. Upcycled doors or windows – An antique door or a small window can be painted and propped up against the front of your house or in the yard.
  4. Picture frames – Stencil the numbers on a board and frame it. Hang it from a ribbon on the door.
  5. Light fixtures – Paint house numbers on the side of a large lantern and mount it. Your guests will be able to see the address, even at night.
  6. Monograms – Large scale monogram letters (sold at most craft stores) with painted numbers can be attached to your house.
  7. Planters – Paint numbers on large containers with colorful plants and place them at your entrance.
  8. Seasonal creations – Design an address plaque that allows you to change out the decorations with the season. A metal plate made from roof flashing will allow you to place seasonal magnets on your display.

Replace Old Mailboxes

Many people have house numbers on their mailboxes at the street. Liven yours up by repainting the box and adding stylized numbers in a bright color. If your mailbox has seen better days, replace it. Read our blog, Replace Your Old, Damaged Mailbox in 5 Easy Steps for helpful tips on getting it done right.

Envy of the Neighborhood

If impressions are lasting, be sure the one you make is a good one. Your home’s curb appeal could be the envy of the neighborhood – and functional at the same time. Make sure your address display is easy to read, placed where it can be seen and shows your unique style (you want to show off your handy work).

Expert Advice

From miter saws and circular saws to drills and orbital sanders our expert staff is always on hand to help with your next DIY home improvement project. As always, if you have any questions about pricing or how-to’s, don’t hesitate to contact us. Stop by our store — we’re open seven days a week.

Categories: DIY Projects, How-To's | Tags: , , , , , , , , , | Leave a comment

Keep Popcorn in the Bowl & Off the Ceiling

How to Remove Your Popcorn CeilingIs looking at your ceiling giving you the inspiration for your next DIY project? If you want to remove that ugly popcorn texture immediately, then it is! If you’ve also heard this is an easy thing to do, then you’ve heard right. The process does create a mess; however, with a little preparation (and our help) you can tackle that popcorn ceiling – no problem. Ready to get started?

What You’ll Need for Popcorn Ceiling Removal & Repair

Beware – Asbestos Often Lurks in 70’s Ceilings

Popcorn ceilings and acoustical panels were all the rage in the 60’s and 70’s, but today they are a turn-off to potential home buyers. They can be used to hide flaws in the drywall but they collect dust, which may aggravate allergies. The biggest drawback is popcorn ceilings installed prior to 1979 often contain asbestos and will need to be tested. These ceilings are only dangerous if disturbed, which is why professionals need to remove them.

6 Steps to Removing Popcorn Ceilings

  • Prepare the room – Remove furniture and light fixtures; lay plastic over walls, floors and doors to contain dust and debris.
  • Wet the ceiling – Spray water lightly over small sections of the ceiling to soften it up and make it easier to remove.
  • Scrap it off – Use a texture scraper for larger areas and a putty knife for corners and trim.
  • Sand the area – To remove any remaining lumps, sand the ceiling and then run a damp sponge over it to remove dust and debris. Allow to dry.
  • Make repairs – Redo any failed joints and edging tape with drywall mud. Fill in cracks with spackle. Lightly sand again.
  • Prime and paint – Use a bright white ceiling paint to help reflect light in your room.

This is a Messy Job If You Aren’t Careful

This stuff is like wet oatmeal that dries into annoying drywall dust, so unless you want it to get into everything, hang and lay plastic drop cloths. Overlap and tape all the seams. It may seem like overkill but when done all you do is remove the tape, roll the plastic up and stuff it in a trash bag.

Don’t Over Saturate Your Ceilings with Water

If you have moistened the ceiling enough, the popcorn material will scrape off easily. You may have to spray it a couple of times because the texture is dry and porous. Don’t overdo it or the drywall can be damaged when you scrap. Go slowly and work in small sections.

A Putty Knife Comes in Handy in Tight Spots

A ceiling texture scraper is good on large spaces and often comes with a refuse bag to collect popcorn debris. To remove popcorn from tight corners and around molding you may want to use a putty knife. Once the ceiling has dried lightly, sand it and vacuum up the dust.

Are You Ready for Some Mud in Your Life?

Prepare to do a little drywall work when removing a popcorn ceiling. Many installers will do a basic/rough taping of the drywall if they know it is to be covered with popcorn texture. For a smooth surface, put a skim coat of drywall mud on the joints and sand lightly.

Ceilings Are Tough on the Back and Neck

A large room can be a tough workout for someone with a bad back or neck, so consider rounding up some helpers or hire a professional. Yes, this is an easy DIY project but only if you prepare your room first. Take your time, do it right and save the popcorn for a bowl in front of the TV.

Expert Advice

Once you finish removing the popcorn ceiling, do you need some advice on painting? Our blog, Paint Like a Pro – Tips for Painting Your Ceilings and Walls, will help you achieve beautiful results. From tank sprayers and wet/dry vacuums to paint sprayers and drywall tools our expert staff is always on hand to help with your next DIY home renovation project. As always, if you have any questions about pricing or how-to’s, don’t hesitate to contact us. Stop by our store — we’re open seven days a week.

Categories: Choosing Equipment, DIY Projects, How-To's, Restore and Renovate | Tags: , , , , , , , , , , | Leave a comment

Team Up with a Landscape Professional for Amazing Results

Sometimes getting your landscape exactly how you want it takes a team effort. Asking for help is not going against the DIYer’s code, it just makes sense. When in doubt on how to deal with a problem area of your yard or how to execute a specific design, call in a landscaping professional to help get you back on track.

Do You Call a Landscape Designer or Landscape Architect?

Say you want to create a backyard Zen garden, who would you call? A landscape designer has a horticulture background and can blend the right plants and materials together for your dream garden. A professionally trained landscape architect can also design your oasis but they know how to alter the lay of the land to appropriately deal with issues like bad drainage problems and soil erosion.

The Benefits of Working with a Landscape Designer or Architect

  • Ideas – They may see options you haven’t considered.
  • Wealth of knowledge – They know the best types of plants, hardscapes or water features that will work well for your landscape.
  • Resources –They have the business contacts and inside knowledge on the different materials and companies you may want to use.

The scope of work you want to undertake will determine which of these professionals you use. (Architects tend to work on larger scale projects.) Decide on your budget and how far you want to take your partnership. Whether you want a design plan or someone to handle the bigger tasks, let these professionals supplement your landscaping needs in whatever way you desire.

Tips for a Productive Landscape Consultation

Your consultation appointment is a meet and greet when the designer or architect assesses the landscape. It is handy to have a site or plat map of your property – a map drawn to scale, that shows the land divisions in your neighborhood – so you can clearly define the area to be renovated.

  1. Give a brief overview of your landscaping plans – You will meet again to go over details. Focus on the desired look and feel you want in your garden.
  2. Tell them your budget – They will be able to tell you if your budget is feasible. You may need to do the work in stages as you can afford it.
  3. Discuss what you want from them – Do you just want a design plan or do you intend for them to build elements? Define your role and where you want to use your DIY skills.
  4. Find out how do they charge for services – This could be hourly or a lump sum quote. The standard request is to pay the cost of permits and some materials upfront. You should get an itemized quote within a reasonable time after your consultation.
  5. Ask for references and to see a portfolio – Most professionals will have a list available and their website should have photos of finished work. Ask them if you can contact their other clients.
  6. Discuss whether they are licensed and bonded – If they are doing some of the work then they should have insurance to cover their employees.

Why Go Through a Major Landscaping Project Alone?

A landscape designer or architect can resolve issues you have in your yard or help you formulate a game plan for that total makeover. Seek out the expertise you need and you may find it is the beginning of a beautiful friendship. Here’s looking at you, DIYer.

Expert Advice

From bobcats and backhoes to wheelbarrows and shovels our expert staff is always on hand to help with your next DIY landscaping project. Does your landscaping design include a retaining wall? You’ll find lots of helpful tips in our blog, Summer Garden Update #1: Building a Retaining Wall. As always, if you have any questions about pricing or how-to’s, don’t hesitate to contact us. Stop by our store — we’re open seven days a week.

Categories: Gardening and Lawn Care, How-To's, Restore and Renovate | Tags: , , , , , , , , , | Leave a comment

10 Ways to Boost Your Home’s Curb Appeal Now

10 Wasy to Improve Curb AppealIf you watch home improvement shows, you’ve heard about the importance of curb appeal for your home. Is it really that vital? We are here to tell you that working on your curb appeal should be on your to-do list, even if you aren’t listing your home in the immediate future.

Good First Impression

“First impressions are lasting” is something your mom drilled into your head about your appearance, so why wouldn’t the same apply to your home? Buyers judge a house first from the outside – whether in person or online. Most realtors will tell you that your home’s curb appeal can make or break a sale.

The Right Curb Appeal Can:

  • Increase the sale price of a home
  • Attract more potential buyers
  • Boost the overall value of your home

Curb Appeal’s Immediate Benefits

If you think of your house as a work in progress, you will recognize that working on DIY projects now will not only let you take your time and spread the cost of home improvements out, but you and your family will have a chance to enjoy your home’s new look before you’re ready to sell.

10 Boosts for Curb Appeal

  • Pressure wash everything – Clean the exterior of the house, the driveway and the garage door. Wash your lawn furniture as well.
  • Paint the front door and trim – Freshening up the entry way gives the home an inviting feeling.
  • Invigorate your landscaping – If your grass is thinning out, install sod. If your shrubs are overgrown, trim them. Plant flowers to give a pop of color to the front.
  • Check the roof – If your roof has seen better days, then replace it. Realtors say that a recently replaced roof can boost the sale price and you should be able to recoup your cost.
  • Clean gutters – Nothing ages a home more than overgrown gutters, so get out the ladder.
  • Fix driveway cracks – Like the roof, this is an immediate turn off for buyers who don’t want to deal with big repairs right off the bat. Seal cracks or consider resurfacing.
  • De-clutter the exterior – Walk around your house and look for ways to clean up. Stash lawn equipment, hoses, extra lawn furniture and toys.
  • Clean and fix windows – Wash them inside and out to let the light in. Buyers are attracted to homes with bright interiors. Fix any windows that may be cracked or do not open.
  • Organize the garage – Clean in and around it, and install an organizational system. If your garage doors do not open properly then repair or replace them.
  • Stage your home – Just as you do on the inside, plan how to make your home shine on the outside. Ask a realtor or friend to come and give you their opinion.

Killer Curb Appeal Improves the Neighborhood

Whether you are listing your home now or not, getting a jump on boosting your home’s curb appeal is just prudent planning. Walk around the exterior and take notes on what you need to do. Figure out your plan of attack and go for it. Give the outside of your home the same attention to detail you do on the inside. Everyone will soon know where you live – it’s the house with the killer curb appeal.

Expert Advice

From circular saws and ladders to pressure washers and paint sprayers our expert staff is always on hand to help with your next DIY home project. Worried about how to improve your cracked driveway? Our blog – 4 Steps to Renew an Aging Concrete Driveway – has helpful tips to get you started. As always, if you have any questions about pricing or how-to’s, don’t hesitate to contact us. Stop by our store — we’re open seven days a week.

Categories: DIY Projects, How-To's, Restore and Renovate | Tags: , , , , , , , , , | 1 Comment

8 Ways to Kick Your Backyard Up a Notch

create your perfect backyard entertaining areaWith summer in full swing, you want to entertain outdoors in a backyard that is something special. We’ve put together a list of what we think makes for a perfect outdoor entertaining area, including links to some of our past articles – see if you can’t find your next DIY project!

Big or Small, Utilize It

Whether your backyard is big or small really doesn’t matter, it’s how you utilize your space that counts. Your first task is to determine how you’ll use the entertainment area and what kind of budget you have to work with. Do you want to use your entertainment space:

  • for the kid’s pool parties?
  • for grilling with friends?
  • for relaxing with your family?
  • all of the above? 

Create Entertainment Zones

Just like rooms in your house, divide your yard up into zones – dining, entertainment, and conversation areas. See where they best fit in your landscape and tie them together into a cohesive design. Your backyard may just need tweaking in order to have it just the way you want it.

8 Elements for a Perfect Outdoor Entertaining Area

  • Water – This could be in the form of an in ground pool or maybe a backyard pond but a water feature will boost the value of your home and provide plenty of enjoyable days outside with friends and family.
  • Covered dining area – Consider installing an awning or roof to protect your mealtime from bad weather. It would extend the usability of your backyard. A covering like a pergola or fabric curtains will give the space a romantic feeling.
  • Grill – Whether it is charcoal or gas, summertime is grilling time so incorporate one into your entertainment area. Remember to give yourself storage space nearby to stash all your grilling accoutrement. Treat it like an outdoor kitchen, add a small refrigerator.
  • Deck – It moves you out of the house and into the yard. Your deck can be where your grill is located and where your dining area is. You can have different levels of a deck to include space for dining and conversation.
  • Outdoor lighting and sound system – Trying to dine by the light of an outdoor flood light can kill the mood in a hurry. Consider lights for your deck, grilling area and walkways. Add speakers to your space so everyone can enjoy the music or the big game.
  • Poolside Bar – If pool parties are your thing then having a convenient snack area close to the pool is a perfect way to extend the outdoor fun and keep wet feet out of your house.
  • Lawn and garden – Having a section of lush grass for kids to play on or a beautifully scented garden to stroll through extends your entertaining possibilities into the far reaches of your yard. Scatter conversation areas throughout your garden by adding benches and lawn furniture.
  • Outdoor fire pit – Summer always goes by so fast and installing an outdoor fire pit or fireplace can help extend your outdoor entertaining season into the fall.

Personalize Your Space with Decorations

Use decorative design elements like colorful cushions, pillows, planters and garden art to help tie your entertainment zones together. Come up with an outdoor theme that reflects you and your family’s interests – favorite sports teams, places, travel dreams or heritage, for instance.

Create the Perfect Entertainment Area for You!

Your backyard is a blank canvas for you to create the perfect entertainment area. Hopefully we have given you some ideas on how to kick your space up a notch. So get busy! Summer is calling and that grill isn’t going to light itself.

Expert Advice

From circular saws and nail guns to orbital sanders and drills our expert staff is always on hand to help with your next DIY backyard project. As always, if you have any questions about pricing or how-to’s, don’t hesitate to contact us. Stop by our store — we’re open seven days a week.

Categories: DIY Projects, Gardening and Lawn Care, How-To's | Tags: , , , , , , , , , , | Leave a comment

9 Tips for Building a Backyard Pond

how to make a backyard pondBackyard ponds filled with exotic fish and tranquil waterfalls are a beautiful addition to any landscape. In our previous blog, How to Build a Backyard Pond in 10 Simple Steps, we outline how to begin building a pond. Before you starting digging though, we have some tips to make this DIY project a success.

Pond Kits Give You Everything You’ll Need

The popularity of water gardening and fish ponds has grown so the supplies and the equipment you need are easy to find. Not sure what you will need? Pond kits come with all the required parts – pump, pipes and liner – and are readily available.

Bigger Ponds Are Better

If you use your own design, go bigger! The more fish and plants you have, the healthier the pond, so larger ponds actually require less maintenance. Keeping the water clean is key. Making sure you have the right size pump for your pond is important. Too small and the pump will be overworked and break down.

Pond Maintenance is a Must

A pond is very much like a swimming pool when it comes to maintenance. You will need to clean the filter frequently and remove any debris. Knowing how to service your own equipment will keep your costs down.

9 Tips for Building a Backyard Pond:

  • Buy a good liner – A good butyl rubber liner can last up to 20 years. Use carpet padding or landscape fabric underneath it for protection.
  • Avoid sharp rocks – Use smooth stones to line the pond to avoid tearing the liner. You need flat ones to line the edge.
  • Build a pond shelf – This is a partially submerged ledge where you can place plants.
  • Include rock overhangs – Give your fish places to hide and escape the hot sun.
  • Have a GFCI outlet – Plug the pump into a Ground Fault Circuit Interrupter outlet. It needs to be at least five feet away from any outdoor water.
  • Bury your electrical wires – Use PVC pipe to bury them safely in the ground and avoid having someone trip over them or an animal chew through them.
  • Consider your yard’s rain runoff – Locate the pond where it will not fill up with runoff water from your yard or a neighbor’s. Factor in an overflow stream or waterfall where the pond water can go if it does flood.
  • Add an eduction jet and skimmer – The eduction jet creates underwater currents to avoid stagnation and the skimmer will help clean of fallen leaves and debris.
  • Include a bead filter and UV Water clarifier – A bead filter traps sand and debris and a clarifier keeps algae blooms from occurring.

Landscape With A Purpose

Landscaping in and around the pond is your next big step. Select plants that will help keep the water clean and algae free. When installing your plants, use aquatic potting soil. Regular potting soil contains nutrients that will encourage algae growth. Mulch the plants with pea gravel. Start the plants on the pond ledge to acclimate them to the water. Once you have them in the right spot, then submerge them. Plants that add to your waterscape include:

  • Water moss
  • Hornwort
  • Curled pondweed
  • Lotus
  • Canna – Use in the pond or outside
  • Pitcher plant
  • Taro or Elephant’s Ear – Use in the pond or outside
  • Papyrus
  • Water Lily

Protect Your Fish

Feed your fish at least once a day during warm weather. Cut back to two or three times a week during colder weather. If you have a small pond, make sure it does not freeze solid during winter. Decaying plants release gases that get trapped under the ice and kill the fish. Install a floating deicer to keep the surface open.

Your Hard Work Pays Off

When you look back on the hard work that goes into this DIY protect and how great it turns out, you’ll be convinced that a backyard pond is a great investment for your home and a wonderfully relaxing place for your family to unwind.

Expert Advice

From backhoes and trenchers to wheelbarrows and shovels our expert staff is always on hand to help with your next DIY landscaping project. As always, if you have any questions about pricing or how-to’s, don’t hesitate to contact us. Stop by our store — we’re open seven days a week.

Categories: DIY Projects, Gardening and Lawn Care, How-To's | Tags: , , , , , , , , | Leave a comment

How-To Transform Your Walls with Texture

how to give your walls textureWant to try something different to upgrade the look of your walls? Express your creative side with textured paints and techniques, and transform your space into a Tuscan villa with stucco walls or a rich marbled hall. Let the walls be your canvas and add some texture to your life.

Be Adventurous with Brushes, Sponges and Paper

Decide on the look you want and start experimenting. Ready-made products are always easy to use, but be adventurous and try brushes, sponges or tissue paper to create unique looks. Good results depend on good preparation so clean, patch and sand your walls before painting. If your walls already have texture on them, remove it before adding a new one.

4 Products That Add Texture to Walls:

  • Textured paint – Comes in grades ranging from very fine to coarse. Easy to use but may be limited in color selection.
  • Texture additives – Mix it with regular paint and adjust the amount of grit for your desired look.
  • Joint compound – Apply to a wall and then use a texturing tool to make the pattern you want. Allow it to dry completely before sanding or painting.
  • Textured wallpaper – Add this to your wall with strong adhesive, prime and paint.

A Paint Sprayer Makes Texturing a Breeze

If you decide to use a textured paint but can’t find the color you want, use it as a base coat. Apply a top coat in the color of your choice with a paint sprayer to finish off your look. Textured paint can be thick (to give you time to work with it) so allow plenty of drying time.

Spackle Your Way to a Beautiful Design

Joint compound or spackle is easy to use and slow drying, which gives you plenty of time to craft your design. Practice your texturing method first and perfect your technique. Once dry, use fine grit sandpaper to smooth out mistakes or to allow more of your base coat to come through.

Methods to Texture Walls:

  • Combing – Pull a whisk broom, thick bristled brush or a comb through the paint or compound to create ridges or patterns. Use vertical and horizontal strokes to create a woven look similar to rice paper.
  • Rag Rolling – An old rag, dipped in paint and rolled over a wall, creates a dappled effect. Add multiple layers and shades of paint for visual depth.
  • Smooshing – Apply a coat of paint, press a piece of plastic into it and then gently remove it to achieve a marbled look.
  • Sponging – Create irregular patterns by dipping a sponge (natural or synthetic) in paint and smudging walls.
  • Patterned roller – Pre-cut rollers make tackling larger areas easier and help keep patterns uniform. Try dipping one end in one color and the other in a second color for a unique look.
  • Wood grain tool – Pull through wet paint to simulate the layered look of wood.
  • Venetian plaster paint – A two-toned paint process that gives the look of marble or stone and lets your underlying color show through.

The Sky’s The Limit with Textured Paint

Be inventive, use different materials like cheese cloth, lace and or wadded up tissue paper to achieve interesting patterns and textures. Stencil a pattern using textured paint to give a 3D effect. There is no wrong way of texturing, so go for it! This is one DIY project where the sky is the limit, so let your creative flag fly.

Expert Advice

From ladders and paint sprayers to orbital sanders and wet/dry vacuums our expert staff is always on hand to help with your next DIY painting project. Worried about using a paint sprayer for the first time? Learn the Proper Techniques for Painting with a Paint Sprayer by reading our blog. As always, if you have any questions about pricing or how-to’s, don’t hesitate to contact us. Stop by our store — we’re open seven days a week.

Categories: DIY Projects, How-To's | Tags: , , , , , , , , , | Leave a comment

Paint It, Don’t Replace It! Tips for Painting Tile

how to paint tileUgly, outdated tile is something many DIY homeowners want to fix. Replacing it is always an option, although this may be the costlier expense. You won’t have to live with it any longer, however. Paint it, don’t replace it! While not a permanent fix, painting your tile can freshen the look of a room and give you more time to make future renovations.

Preparation and Product Selection Are Key

The keys to successfully painting tile are preparing the surface properly and using the right type of paint. Preparing tile is a little more involved than painting drywall but the time you spend doing it right will help the paint look better and last longer.

3 Steps to Preparing Tile for Painting:

  • Clean it – Remove all the soap scum, dirt and mildew from the tiles and grout. Use an abrasive bathroom cleaner and rinse well.
  • Sand it – Rough up the surface using a 180/220 grit sandpaper (synthetic grit paper like silicon carbide or aluminum oxide work well) to remove the gloss off of the glazed surface. An orbital sander will do this quicker and more evenly than hand sanding.
  • Dust it – Wipe the tiles down with a damp cloth to remove any loose debris or grit. It can show through the paint.

Repair Tile and Grout Before Starting

Your tile and grout need to be in good shape. Paint amplifies any imperfection so make any repairs to cracked, chipped or broken tiles before starting. Re-do your grout if it is too dry and cracking. Remove all caulk from around tubs and counters. It is best to re-apply a fresh bead when your painting is finished. Tape off all fixtures, faucets and mirrors to avoid getting paint on them.

Tips for Painting Your Tile

  • Use an epoxy bonding primer to help the paint adhere properly.
  • For the best color selection use a latex paint (semi-gloss or high gloss) and apply 2 coats.
  • A paint sprayer will give you the smoothest results.
  • If you use a sponge brush, work in one direction to minimize streaks.
  • Lightly sand in between coats to help the paint stick.
  • Finish with several coats of sealant and allow 2-3 days to dry completely.

Painted Tiles Can Last 5 Years

This easy DIY project is a great way to freshen up outdated tile until you’re ready to redecorate or renovate. Painted tiles can last up to five years if you avoid harsh cleaners or scrub brushes. Stop living with ugly tile and get out the paint sprayer. That icky avocado green is going down!

Expert Advice

Wanting to try your hand at installing tile? Our blog, How to Install a Kitchen Tile Backsplash, has some great tips to get you started. From ladders and paint sprayers to grout cutting saws and orbital sanders, our expert staff is always on hand to help with your next home DIY project. As always, if you have any questions about pricing or how-to’s, don’t hesitate to contact us. Stop by our store — we’re open seven days a week.

Categories: DIY Projects, How-To's, Restore and Renovate | Tags: , , , , , , , , , , | Leave a comment

Hummingbird Feeders Liven Up Your Garden

bird feeders liven up a gardenYour garden is not just a random combination of plants and flowers, but an environment for the wildlife that lives there. One of the most entertaining creatures to watch is the Hummingbird as it flits, flies and hovers in search of nectar. Adding a feeder (or two) will attract these tiny birds, providing hours of delight for you and your family.

Fascinating Facts About Hummingbirds

  • According to The Hummingbird Society, 34 of the 342 known Hummingbird species are at risk of extinction.
  • They can hover and fly backwards.
  • They lap up their food with a long thin tongue.
  • Bugs are their primary food source and sugar (that comes from natural or manmade nectar) is the fuel that energizes them.
  • They are voracious eaters, starting to feed as early as 45 minutes before sunrise and continue throughout the day.
  • They are attracted to the color red, although they have no need for red food (forget food dyes!)
  • Leaving a feeder out all year will not entice them to stay. Some birds migrate up to 3,000 miles annually. Bring your feeder in when you haven’t seen a Hummer in three to four weeks.
  • Ruby-throated Hummingbirds are territorial so place feeders in different locations so other varieties such as Rufous, Black-chinned and Calliope will feed.

Flowers First, Feeder Next

Placing your feeder near flowering plants is the best way to attract Hummingbirds. Some of their favorite garden plants are Azaleas, Butterfly Bush, Cardinal Flower and Coral-bells; Flowering Crabtree, Fuchsias, Honeysuckle, Impatiens, Lantana and Weigela. Don’t worry if you don’t see birds while your garden is in bloom, they are too distracted by your gorgeous flowers and will return to the feeder soon.

Hummingbirds Like It Clean

As long as they are kept clean, Hummingbirds have no preference on plastic, glass or homemade feeders. Look for one with feeding ports above the liquid (dripless), that have perches and are easy to clean. Start small until you attract a steady number of birds, then add more feeders.

Fresh Food is Good

Hummingbirds actively avoid a spoiled food source, so changing your feeder every four to five days is essential. Spoiled liquid will look cloudy and may have black mold spots floating in it. Throw away old nectar rather than topping it off.

The Best Nectar Recipe

Because Hummers get their nutrients primarily from flower nectar and insects, skip buying supplemented commercial nectar. Also, avoid using honey, Jell-O, raw (turbinado) or brown sugar, fruit or red dye. Here’s the best nectar recipe:

  • Mix 1-part sugar to 4-parts water
  • Boil for 1-2 minutes
  • Cool and store in the refrigerator for up to two weeks

Prevent Feeder Mold

Use a mild detergent, bottle brush and hot water to clean your feeder before changing the food. Once a month, use a mixture of ¼ cup of bleach to a gallon of water to prevent mold. Full strength vinegar instead of bleach is also a good option, just rinse well.

Bees and Wasps Can Ruin Your Feeder

When Hummingbirds feed they often spill nectar onto surrounding surfaces, which attracts bees and wasps. To discourage them, wipe the feeder ports or dilute the sugar mixture in the nectar recipe. Moving the food source to a new location can help, too – the birds will follow it, but the bees won’t.

Sticky Situation for Ants

Nectar also attracts ants, which is why many feeders come with an ant barrier or water moat. Still, ants can be determined creatures, so try applying a very sticky goo called Tanglefoot to the bottom of the moat tray. Flip the tray upside down on the feeder to keep it out of contact with the birds.

Become a Dedicated Hummingbird Caretaker Today

These delicate aerial acrobats bring zip to your garden and are fun to watch. Become a dedicated caretaker of a Hummingbird feeder today and help save these beautiful creatures for another generation to enjoy.

Expert Advice

Our companion blog, How to Attract Birds and Butterflies for a Livelier Yard, is filled with helpful tips on how to bring more wildlife into your garden. From ladders and drills to shovels and wheel barrows, our expert staff is always on hand to help with your next gardening DIY project. As always, if you have any questions about pricing or how-to’s, don’t hesitate to contact us. Stop by our store — we’re open seven days a week.

Categories: DIY Projects, Gardening and Lawn Care, How-To's | Tags: , , , , , , , , , | Leave a comment

Consider Options Before Diving into a DIY Pool Project

diy fiberglass in-ground poolIf you’ve been thinking about challenging your DIY skills and installing an in-ground pool this summer, consider first whether or not your time, effort (and talent) might be better served on different parts of this kind of project.

Plan for Extra Costs

Every year, 175,000 to 200,000 new pools are built. The average cost of a professionally installed pool runs from $10,000 to $30,000 depending on the size, shape and type of pool you choose. Customers typically spend another $10,000 – $20,000 on all the pool related items; additional landscaping, decking, furniture, lighting and fencing – the kind of projects you can really sink your teeth into.

Let the Professionals Handle the Paperwork

While working with a backhoe might be your idea of a great weekend, leave that part to the pros (as well as dealing with on-site soil and rock issues). Let the pool company determine county, local and neighborhood restrictions as well as HOA (Homeowners Association) rules, which leaves you to focus on the fun stuff that comes along with a pool.

3 Types of In-Ground Pools

  • Concrete lined – While the most expensive, they are durable and can be updated if you want to expand. Can take from 3-12 weeks to install.
  • Vinyl lined – A preformed flexible liner that comes in a variety of colors and textures and takes 1-3 weeks to install. Sharp objects can puncture them so be sure to choose one at least 1-inch thick.
  • Fiberglass – One-piece units that have a super smooth finish and are stain resistant. They are trucked to the site so delivery will affect installation time. A crane needs to lift the pool into place so make sure the equipment has access.

Choose the Right Pool for Your Location

A professional pool installer will know what type of pool works best in your area. Freezing and thawing causes pool materials to expand and contract. Fiberglass and vinyl pool liners can handle the cold weather better than concrete pools. The professionals will make sure the pool is level and the bottom is smooth, not sitting on rocks that can puncture it.

How Will You Use Your Pool?

If family fun is your goal, skip the deep end and the diving board. Most pool activities take place in the shallow end so why not use a third of your pool? Want to swim laps? Cut down on the overall size and install swim jets for resistance. Knowing how you’ll use the pool will determine the right one for you.

The Best DIY Pool Related Projects

  • Fencing – Safety laws require owners to install a fence at least 4 feet high with self-closing/latching gates around a pool.
  • A deck or patio – You will need a place for everyone to gather.
  • Outdoor lighting and outlets – Consider adding a sound system.
  • Landscaping – Add new pathways, sod and plants when construction is finished.
  • Storage for pool equipment and accessories – You need somewhere to store pool supplies and toys, especially in the off season.
  • A whirlpool or sauna – A smaller undertaking than installing a pool but still something your family would enjoy.
  • Add shade – Install an awning over your patio or deck.
  • Maintenance – Rather than sign on for monthly service, you can adjust the chemicals yourself.

A New Pool Provides Plenty of Quality Family Time

Pools may be a big investment and require regular upkeep, but they can also add plenty of quality time with your family and friends. Do your research and decide what kind of pool works for you. Let a professional handle the hard stuff, while you take care of everything else. Before you know it, you will be chillin’ poolside!

Expert Advice

Is your new pool lacking in the entertainment area? Learn How to Construct a Poolside Bar for a DIY project that is sure to get the party started. From bobcats and backhoes to trenchers and plate compactors, our expert staff is always on hand to help you get ready for your next summertime project. As always, if you have any questions about pricing or how-to’s, don’t hesitate to contact us. Stop by our store — we’re open seven days a week.

Categories: DIY Projects, How-To's, Restore and Renovate | Tags: , , , , , , , , , , | 1 Comment

Stones, Wood & Wire Make 1 Indestructible Outdoor Table

gabion wire mesh outdoor tableWant a durable outdoor table and bench set that can stand up to all kinds of punishment, from family to the weather? Consider building one with a gabion wire mesh kit. They are easy to assemble, virtually indestructible and add a touch of “industrial chic” to any outdoor décor.

Versatility and Ease Earn Wire Cages a Big Thumbs Up!

“Gabion” comes from the Italian word “gabbione” meaning ‘big cage’ and that is exactly what these wire containers are. Used in construction and landscaping, it is a box made from wire mesh that acts as a support or building block, which is filled with stones, concrete or dirt. DIYers are building patio benches, planters and even water features out of these versatile containers.

Pre-Cut Kits Make Building a Breeze

You can use rolled wire mesh to build a Gabion cage, although using ready-cut kits is so much easier. They come in a variety of shapes and sizes and are generally constructed out of 3/16th-inch gauge wire. Some are available with a PVC coating so you won’t need to seal them.

Fab Re-Purpose for Old Lumber

Determine the size of your table and where you want to place it. Once your stones are added, moving it will be difficult. Decide on the materials to use for the table top and bench seats. Used lumber, railway ties, pallets and even stone are all options.

Materials & Tools Needed

  • (4) small rectangular Gabion wire kits for bench supports
  • (2) large rectangular Gabion wire kits for table supports
  • reclaimed wood for table top and bench seats
  • (6) small 1” x 2” boards to fasten table and bench tops onto
  • filler material – pebbles, stones or recycled glass
  • angle grinder and safety goggles
  • circular saw
  • pliers

Right Size Supports Make a Sturdy Table or Bench

Select the size kits that will best fit your design and will support the maximum weight expected.

The pre-cut sides of the kit are assembled using the wire spirals provided. After wrapping the wire through the corners bend the ends back with pliers. Use an angled grinder to cut the cage down to the height you want and to trim off any unwanted sharp edges.

Construct a Gabion Table & Benches in 6 Easy Steps

  • Cut wood – Use a circular saw to cut reclaimed wood for table top and benches to the length you desire. Cut 1” x 2” cross supports with 45-degree on ends.
  • Assemble – Join table and bench tops to the cross supports.
  • Brace box – Attach a wire from one side to the other (6” down from top) to help the box retain its shape when rocks are added.
  • Fill cage – Adding a lightweight object or cheaper fill material in the center of the container will cut down on the amount of high grade stones you will need.
  • Add tops to the support pillars – The cross supports should fit snuggly inside bin. Adjust rocks to create a level surface.
  • Paint or stain table top and benches – Depending on the materials used you may want to coat the boards in polyurethane to protect it from the weather.

Endless Choices for Fill Material

If you want a densely packed cage, combine smaller pebbles with larger stones to fill in gaps. Another option is to use logs to line the visible sides and fill the center with cheaper gravel. A chic choice is adding a clear plastic or Plexiglas container inside the cage, lining the outside with sea glass, then filling the rest with sand. The choices are endless.

See What Gabion Cages Can Do for Your Yard

Once you see what you can do with Gabion wire cages, you’ll be ready to tackle bigger and better DIY projects. Why stop with a table? Why not terrace the back yard? Move over Caesar, today you conquered the patio, tomorrow you party!

Expert Advice

Looking for a companion piece to go along with your new table? Our blog, A DIY Couch to Enjoy All Summer Long, has easy tips on building a seating area out of concrete blocks.

From circular saws and angled grinders to paint sprayers and wheel barrows, our expert staff is always on hand to help with your next DIY project. As always, if you have any questions about pricing or how-to’s, don’t hesitate to contact us. Stop by our store — we’re open seven days a week.

Categories: DIY Projects, How-To's | Tags: , , , , , , , , | Leave a comment

Build Your Own American Flag Cornhole Set in 10 Steps

DIY American Flag Cornhole SetAlready making plans for the 4th of July? Well, we’ve got the perfect DIY project that is sure to get your family and guests in the patriotic spirit. Build a stars and stripes cornhole game set! The fun will last long past Independence Day.

This is No Bean Bag Toss!

The dimensions of a cornhole board, according to the American Cornhole Association, should be a 48-inch by 24-inch rectangular shape that is inclined 12 inches off the ground at one end. All you need are the following materials:

  • (4) 2” x 4” x 8’ boards
  • (2) 2’ x 4’ plywood panels (1/2” thickness)
  • (4) 3/8” carriage bolts
  • (4) 3/8” washers
  • (4) 3/8” wing nuts
  • 5” wood screws
  • 5” wood screws

Find Your Favorite Design

Decide on the patriotic decoration for the front. Stripes can be done with painter’s tape and you paint the stars freehand. Research designs on the internet and print your favorite onto stencil plastic or check with your local sign company to see if they can make the stencils for you.

10 Easy Steps to Building an American Flag Cornhole Set

  1. Cut the wood – use a circular saw to cut the pieces for the frame, face and legs.
  2. Construct the frame – join the sides and end segments together with 2.5-inch wood screws. Pre-drill holes to avoid splitting.
  3. Attach face to frame – apply wood glue to the frame, then add the face. Screw the board to the frame. When dry, fill screw holes with wood filler.
  4. Drill hole for opening – measure 9 inches from top and 12 inches from sides to find center. Cut out a 6-inch diameter hole with a jig saw or a 6-inch hole drill bit.
  5. Round one end of legs – mark 1.75 inches from end of each leg and draw a circle across the end of the board. Use jig saw to round it off.
  6. Drill holes /Attach legs – create holes for carriage bolts to secure legs to inside of frame. The rounded end goes at top and bottom of the frame. Legs should fold up underneath. Sand rounded end if they do not move freely.
  7. Sand – use an orbital sander to smooth the top, sides and inside of hole to prevent splintering and cracking.
  8. Paint – prime the board white on the top and sides. Two coats will give you a good solid white for the stripes (paint the legs if you wish).
  9. Tape or stencil flag pattern – use painter’s tape to mark the stripes and a stencil for the stars. Fill in using a high gloss latex paint.
  10. Seal it – after the design dries, add a polyurethane coating to protect it.

Use the Right Tools

You can use a paint sprayer to apply the primer and the sealant. Depending on your design, you may need to use a brush to complete your flag. The board face should be smooth but not slick. Use fine sand paper to smooth in-between the polyurethane coatings to get rid of rough patches. Allow 24 hours to dry.

Show Your True Colors This Fourth!

The materials listed above will produce a complete game set with two boards. You can make your own bags to toss or buy them online. Show your true colors this Fourth of July with a very patriotic cornhole game. Easy to build and fun to play, it is a great summer time distraction. Just don’t forget to mind the burgers on the grill!

Expert Advice

Want to throw a spectacular Fourth of July BBQ but don’t know where to start? Check out our blog, 3 Things to Help Pull Off Your First Outdoor Barbecue of the Season to get your home ready to entertain guests. From circular saws and drills to paint sprayers and sanders, our expert staff is always on hand to help you tackle your next fun backyard project. As always, if you have any questions about pricing or how-to’s, don’t hesitate to contact us. Stop by our store — we’re open seven days a week.

Categories: DIY Projects, How-To's | Tags: , , , , , , , , , , , | 1 Comment

Not Sure What DIY Project to Do Next? Ask a Professional

realtor tips for home improvementsTrying to decide which home improvement project to tackle next? When in doubt, ask people in the know. A professional realtor, interior designer or home inspector can steer you in the right direction on DIY projects that will add more value to your home.

How Professionals Show You the Way

Want to know how much money to spend on renovating your house? A realtor can help you decide on projects that will bring in buyers. An interior designer can advise you on the latest trends and colors to use while a home inspector will flag potential problems for you, like leaks, electrical issues, termite damage and building code violations. These professionals can help you separate what is an important improvement from a personal preference.

Focus Your Efforts on these 7 Areas:

  • Curb appeal – Sprucing up the landscape and front entry boosts the value of your home. Some of the ways you can do this are to:
    • clean up the grounds, edge and prune bushes
    • plant new flowers and shrubs for color
    • update lawn furniture, especially on porches
    • replace an old doormat
    • paint or re-stain the front door
  • Floors – Dirty old carpets are a turn off to buyers and are bothersome for allergy sufferers. Consider replacing it with engineered hardwoods or laminate. At the very least, have your carpets cleaned professionally.
  • Windows and Doors – Energy efficient windows and doors will help cut your power bills and provide a big selling point when you do decide to sell.
  • Paint – This is a great way to freshen up your entire house. Realtors will encourage you to use neutral colors to help buyers envision how their furniture and artwork will fit in the space.
  • Clean up – If you aren’t going to paint them, then scrub your walls. Make sure there are no dings or scuff marks. Don’t forget to clean the window blinds, baseboards and trim.
  • Cabinets – Even if you aren’t selling right now, declutter. It will save you time and effort, especially when it comes time to pack and move:
    • Add drawer and cabinet organizers
    • Fix loose drawers and hardware
    • Dust and clean out drawers and cabinets, especially in bathroom
    • Wipe down the outside of kitchen cabinets to remove grease from cooking
    • Paint or re-stain
  • Lighting – Like fashion, lighting fixtures go out of style. Update them and use new energy efficient bulbs. Natural light sells a house so consider installing a skylight or sun tube in dark, small rooms.

Small Fixes Bring Big Returns

You don’t have to take on a big renovation. Small do-it-yourself projects can make a big impact on the value of your home so don’t discount them. Just changing out an old vanity and the sink fixtures can revive the look of a bathroom. Focus your efforts on projects that will boost your home’s selling potential while adding to your family’s enjoyment. So ask a professional for their opinion, you’ll be glad you did.

Expert Advice

A fresh coat of paint is an inexpensive way to liven up any home – inside or out. Check out our blog, Paint Like a Pro – Tips for Painting Your Ceilings and Walls for the helpful hints you need to get started. From floor sanders and drills to paint sprayers and carpet cleaners, our expert staff is always on hand to help you get ready for your next home improvement job. As always, if you have any questions about pricing or how-to’s, don’t hesitate to contact us. Stop by our store — we’re open seven days a week.

Categories: Featured Products, How-To's, Industry Trends, Restore and Renovate | Leave a comment

8 DIY Projects That Boost the Value of Your Home

diy home improvement projectsThinking of selling your home or just wanting to update your surroundings? Before you start an expensive kitchen remodel, consider how a few DIY projects could not only add value to your home, they can make your house more appealing to potential buyers.

Home Improvements Increase Real Estate Value

First, make a list of all the improvements you would like to accomplish. Talk with or a realtor or an interior designer for ideas on how to enhance your home’s appeal. Keep renovations in line with the sales value of your home and neighborhood. Your goal is to get a good return on your investment.

Fix Essentials First

Buyers typically look for existing houses where the basics like the roof, foundation and plumbing are in good shape. A remodeled kitchen cannot make up for a leaky roof; however, replacing a worn out roof can return as much as 80 percent of its cost at resale.

8 DIY Projects That Boost the Value of Your Home

  • First impressions – The front entryway is your first an opportunity to make a good impression. A freshly painted door, an awning and a working doorbell go a long way.
  • Address the basics – Add insulation, repair leaks, clean windows, rugs and wood floors. In addition, have the furnace and septic tank (if applicable) inspected.
  • Let in the light – Dark rooms are uninviting. Add new light fixtures and consider a sun tube or skylight to bring in natural light.
  • Improve the landscape – Curb appeal gets buyers in the door. Unkempt bushes and trees obstruct views. Mow the lawn, prune and plant shade trees and drought tolerant plants.
  • Go green – Use energy efficient appliances if replacements are needed.
  • Don’t forget your floors – Repair cracked tiles and squeaky floor boards. If you do replace the floors, consider engineered hardwoods or tile as an allergy free alternatives.
  • Paint – Neutral wall colors help buyers visualize their belongings in a room.
  • Declutter – Purge and organize clutter to help rooms look larger.

Add More Space for a Future Pay Off

If you’re simply looking to make improvements that will pay off down the road, consider building an addition. Every 1,000 feet increase of space can boost the sales price as much as 30 percent, especially when you keep the total square footage in line with the houses available in your neighborhood.

Quick and Easy Bathroom Fixes

Renovations don’t have to be overwhelming. Tackle one room at a time. If you can’t afford a major bathroom redesign, try some of these easy repairs:

  • Clean the grout
  • Apply fresh caulk
  • Replace the faucets
  • Add a new toilet seat
  • Update the vanity
  • Install a low flush toilet

Your DIY Efforts Will Show Big Results

Home improvements can help sell your home faster as well as make your life more enjoyable. Come up with a game plan, do your research and go for it. Take things one step at a time and soon your efforts will show big results.

Expert Advice

Still not sure what DIY project to start first? Our blog, Check These 10 Indoor and Outdoor Improvements Off Your Spring Checklist has helpful tips to get your house in awesome shape.

From circular saws and drills to paint sprayers and pressure washers, our expert staff is always on hand to help you get ready for your next home improvement job. As always, if you have any questions about pricing or how-to’s, don’t hesitate to contact us. Stop by our store — we’re open seven days a week.

Categories: DIY Projects, How-To's, Industry Trends, Restore and Renovate | 1 Comment

10 Steps to Cool Savings on Energy Costs

cut energy costs this summerWhat’s worse, the scorching summer heat or the burn you feel when you open the power bill? This year, don’t let high temperatures get you hot under the collar. A few simple DIY changes around your home will help you beat the heat and save some cool cash.

Take Steps to Lower Your Power Bill

Besides hanging a huge beach umbrella over your house all summer, what can you do to lower energy costs? By taking some of these simple steps, you will not only lower your power bill during the summer but all year long.

10 Steps to Cut Energy Costs During the Summer

  • Unplug your devices – Don’t just turn TVs and other appliances off, unplug them. They continue to drain power even when off. Invest in a smart strip which shuts off the electricity directed to each item.
  • Use ceiling fans – Fans circulate the air in a room and keep you cool. Set the thermostat at a higher temp and turn the fans on in the room you are occupying.
  • Close doors and vents – When rooms are not in use (like your guest rooms), shut them off and close off air vents to reduce the square footage your AC has to cool.
  • Add insulation – Sealing air leaks in walls, the attic and around pipes will cut down on energy loss. Blow more insulation into your attic.
  • Turn off lights – Don’t leave lights on in rooms you are no longer in.
  • Have the A/C inspected – Keep your system running efficiently and have your duct work checked for leaks. Dirty air filters make your unit work harder so change them regularly.
  • Install a programmable thermostat – These turn your AC down or off while you aren’t home.
  • Dry clothes outside – Take advantage of the summer heat and hang your clothes on a line or rack to dry. Dryers (along with refrigerators) are the biggest drain on your home’s energy.
  • Plant some shade – Trees and shrubs can help lower the heat on the outside of your home. Deciduous trees (ones that lose their leaves in fall) can offer shade during the summer but allow light to warm the house in the winter.
  • Turn off the oven – Plan meals that don’t involve heating the oven. Try using a toaster oven for warming and browning or a microwave … or grill outside!

Raise the Temperature and Start Saving

If you’re looking for even more cost savings, start setting your thermostat at a higher temperature. For every three degrees you raise it you can save 20% on your power bill. A good rule of thumb is to keep your thermostat set at 75 degrees or higher and use ceiling fans. A programmable thermostat will allow you to keep the A/C set at a higher temperature during the day and a lower one during the evenings when you are home.

Protect Your Home from UV Heat and Damage

Install UV film on windows that get substantial amounts of direct sun. It will reflect the heat back from the glass while allowing the light to come in. It is also good for keeping the sun from damaging expensive wooden doors and entry ways.

Roof Color Can Affect Its Temperature

If you are considering replacing your roof, look into a “cool roof”. The material these roofs are made of help reflect the heat and will keep the attic cooler. Roof color is also important. In warmer climates a lighter roof will help deflect heat while darker ones will hold heat.

Stay Cool with Big Savings

Making a few DIY changes around your home will lower your energy costs and your blood pressure. Stay cool this summer and use the money you saved on your power bill toward your next home project.

Expert Advice

Trying to get that power bill under control? Our blog, Find Air Leaks in Your House and Plug ‘Em Up Fast, will help you determine where they are in your home and how to tackle them.

From a ladder and a drill to an insulation vacuum and a blower, our expert staff is always on hand to help you get ready for your next DIY project. As always, if you have any questions about pricing or how-to’s, don’t hesitate to contact us. Stop by our store — we’re open seven days a week.

Categories: How-To's | Leave a comment

4 Steps to Renew an Aging Concrete Driveway

diy concrete driveway repairYou’ve been working really hard on your home’s curb appeal and there’s one thing that has you stumped – the driveway. Do you repair the cracks or bite the bullet and replace the whole driveway? It’s a quandary facing many homeowners today. Let’s look at your options.

Age Matters When It Comes to Concrete

A driveway puts up with a lot, from the weight of the family cars to harsh weather conditions. Unfortunately, age does matter when it comes to driveways. Concrete surfaces have a life span of 20-25 years before the materials just give out.

Take a Real Look at Your Driveway

Take a close look at the condition of your concrete. Cracks less than a quarter of an inch wide are usually signs of expansion and contraction due to weather. Cracks larger than a quarter inch may be due to tree roots or water erosion underneath. Potholes are normally a sign that the concrete is deteriorating to the point where it needs to be replaced.

What You Need to Repair Your Concrete Surfaces

  • Cement resurfacing mixture – A fast drying polymer based coating that covers cracks.
  • Long-handle squeegee – To apply resurfacing material and work into cracks.
  • Duct tape – Tape off expansion joints to avoid filling them in with resurfacing solution.
  • Chisel – To cut debris from cracks.
  • Wire brush – Helps dislodge broken concrete.
  • Concrete sealer – Fills and expands in small cracks.
  • Trowel – Works sealants into cracks and smooths surface.
  • Sand – To fill in deep cracks first before applying sealant.
  • Water sealer – Helps waterproof your concrete.

Power Wash Your Driveway

Once you determine the condition of the concrete, power wash your driveway. Use cleaners and scrub brushes to remove motor oil, dirt and stains. A clean surface allows sealants to adhere and fill in cracks fully. Let the concrete dry full before using sealants.

Repair Your Concrete Driveway in 4 Steps

Step 1 – Fill cracks and potholes. Use a trowel to compress concrete caulk or sealer into cracks.

Step 2 – Protect yourself. Many products have harsh chemicals and fumes, so wear gloves and a mask.

Step 3 – Let it cure. It may be 48 hours before you can park cars on it. Read your product instructions for recommendations.

Step 4 – Seal it. After your repairs have dried, protect your concrete with water sealant.

Renew by Resurfacing

Resurfacing is an economical way to renew your concrete at a fraction of the cost of replacing it. The liquid compound dries quickly (in about 30 minutes) so work fast with a squeegee to smooth it across the concrete. Tape off your expansion joints so they aren’t filled. For a non-skid surface, use an old broom to brush across the mixture, giving it texture.

So Many Choices

Resurfacing allows you to choose different finishes (glossy or dull), colors and patterns. Due to the quick drying time, test a small area until you get the look you want. This process is not a permanent fix and will need to be re-done every two to three years.

Improve Your Curb Appeal

If you are trying to sell your home, a cracked driveway is going to raise a red flag for buyers. Consider resurfacing prior to putting your house on the market. It is amazing what a fresh, new driveway can do for your curb appeal.

Keep Your Driveway Looking Good for Years

Replacing a driveway can be a big expense but thankfully one that you only have to do once every 20 years, give or take. Repairing cracks as you find them will help keep your drive looking good for years to come.

Expert Advice

From concrete mixers and trowel machines to pressure washers and grout pumps, our expert staff is always on hand to help you find the right equipment for your next DIY home improvement project. Want more information on repairing a driveway? Our blog, The 7 Step Process to Restore Your Cracked and Eroded Driveways will help. As always, if you have any questions about what to choose, pricing or how-to’s, don’t hesitate to contact us. Stop by our store — we’re open seven days a week.

Categories: Featured Products, How-To's, Restore and Renovate, spring checklist | 1 Comment

Create a free website or blog at WordPress.com.